Mailchimp offers an expanded functionality that allows you to schedule your emails, ensuring they are sent at a specific date and time. This user guide will walk you through the steps to schedule your emails effectively within Mailchimp.
Scheduling the email
- Navigate to the Ascendix Search and initiate the Mailchimp campaign.
- In the Wizard, Campaign Information enable the schedule option by ticking the checkbox labeled "Schedule your email.” By default, this checkbox is unchecked. Please note: Email scheduling feature is available for Mailchimp paid monthly plans.
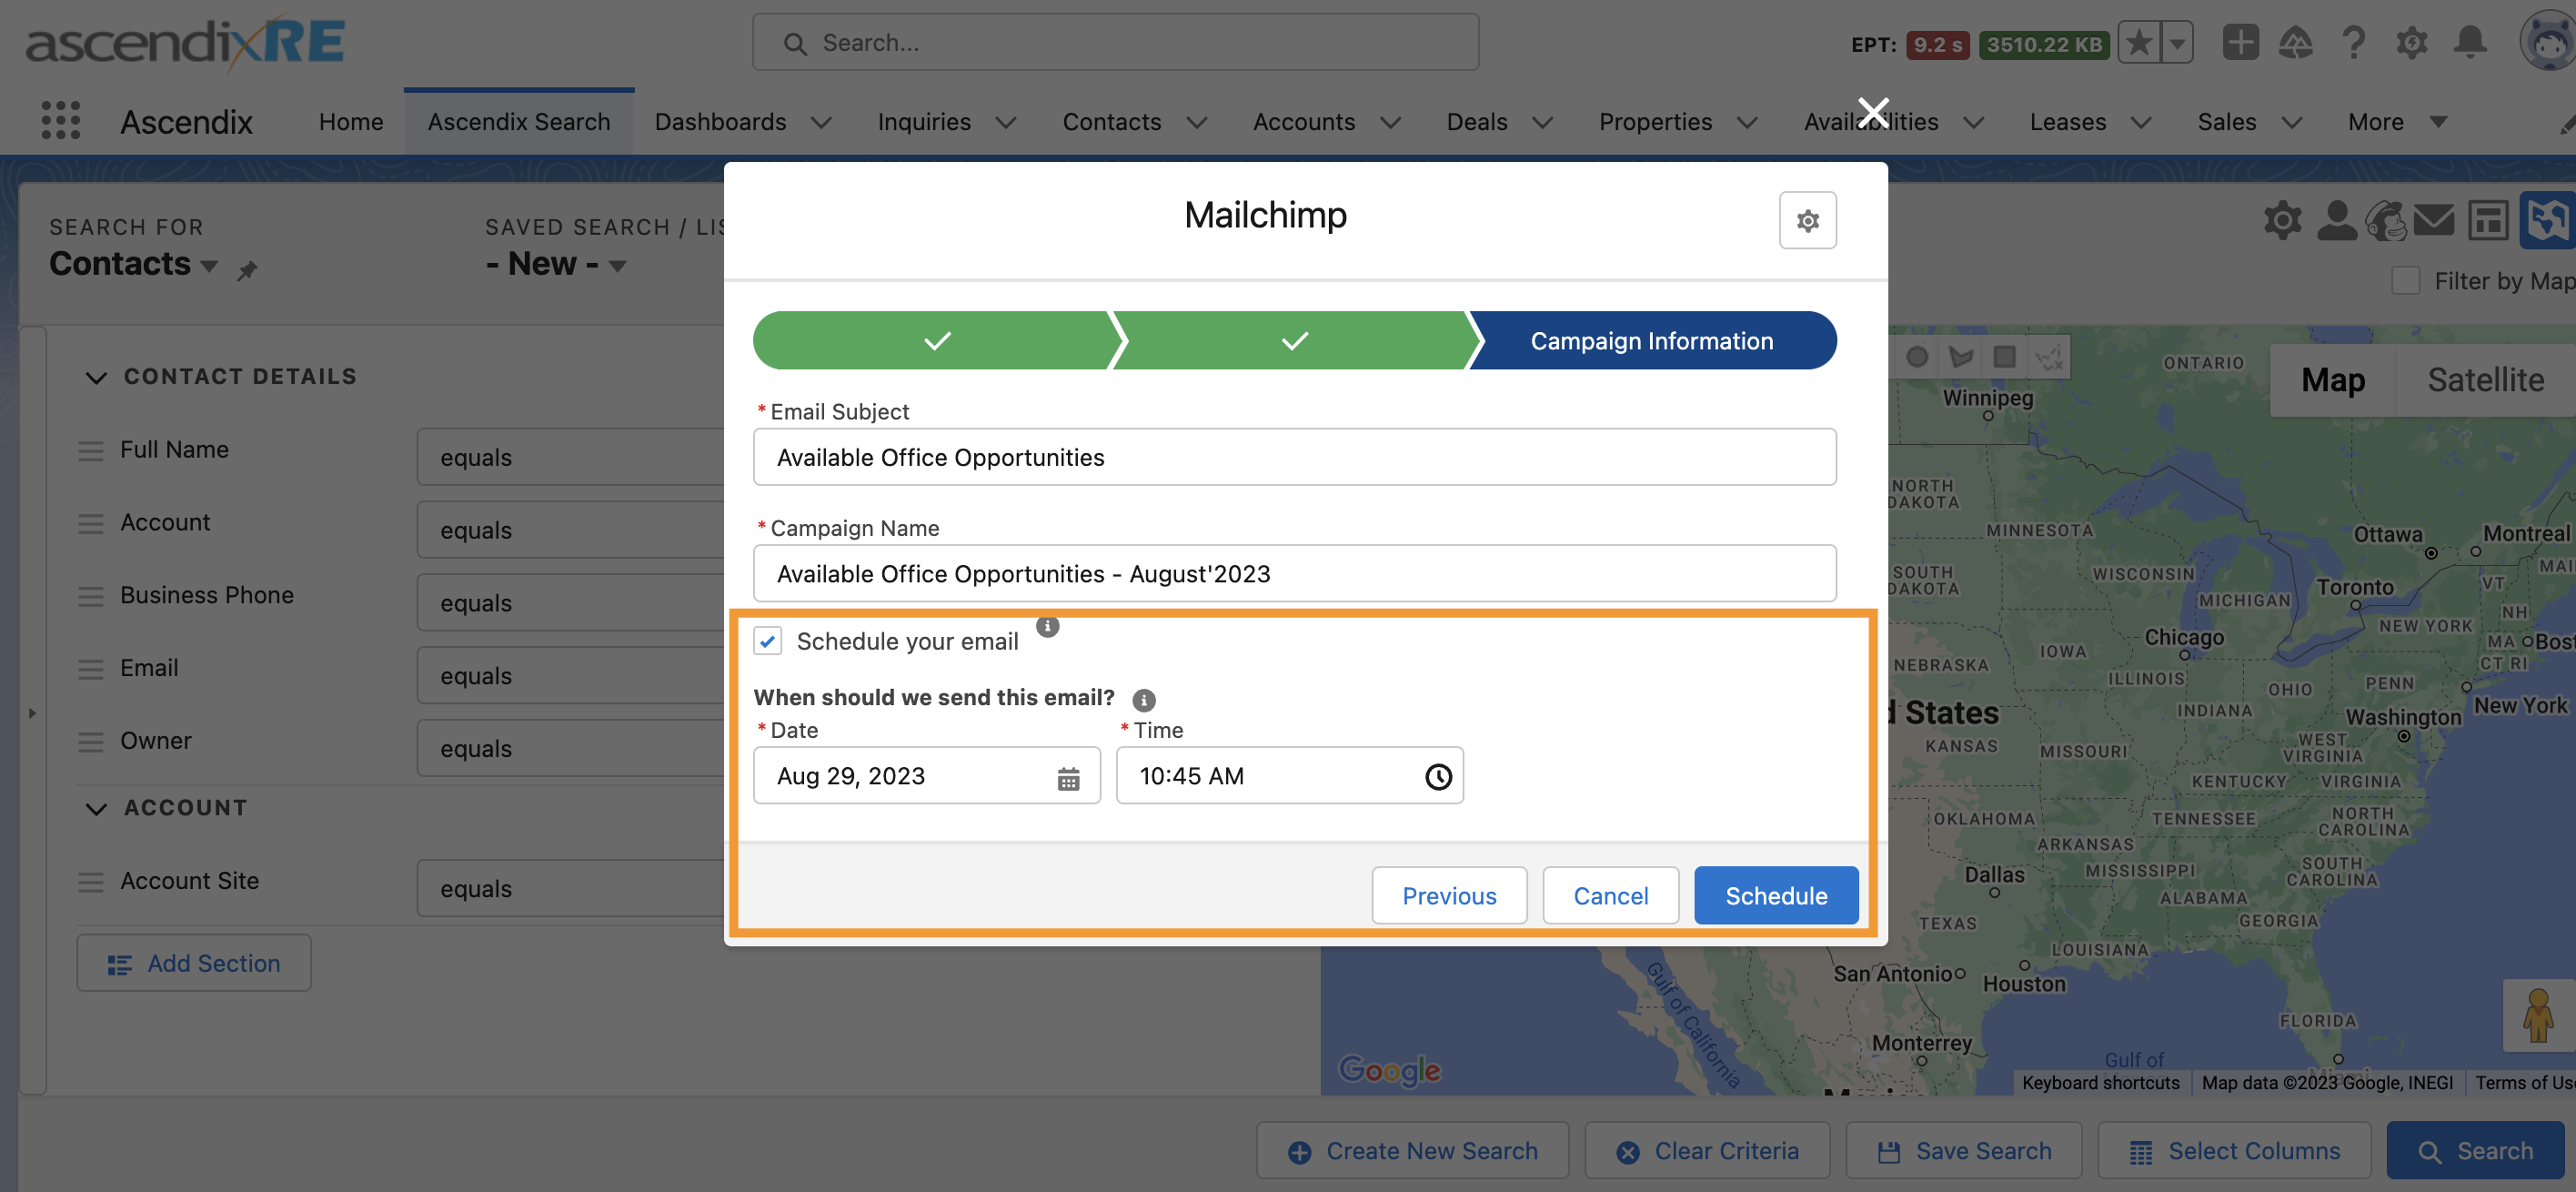
- When the checkbox is checked, an additional text field will appear below it, prompting you to enter the scheduled sending time.
- Enter the desired date and time for sending the email. Campaigns may only be scheduled to send on the quarter-hour (:00, :15, :30, :45). Also, keep in mind that the format should be in accordance with the system's date and time settings.
- Hit the Schedule button to schedule the email.
Error Handling for Past Dates
If you select a date and time that has already passed and click the Send button, an error message will appear. The error message will state: "Invalid date and time. Please schedule your email for a time in the future." Please ensure that you select a future date and time to avoid this error.
If you do not obtain the Mailchimp paid monthly plan, you will encounter the error following by the bell notification: “Your Mailchimp subscription doesn't support scheduling emails feature.”
Time Limitation
When scheduling an email for the future, there is no time limitation imposed. You have the flexibility to select any date and time.
Confirmation Notifications
After selecting the desired date and time and clicking the Send button, a notification will pop up confirming that your email has been scheduled successfully:

Additionally, a bell notification will appear, indicating the following details:

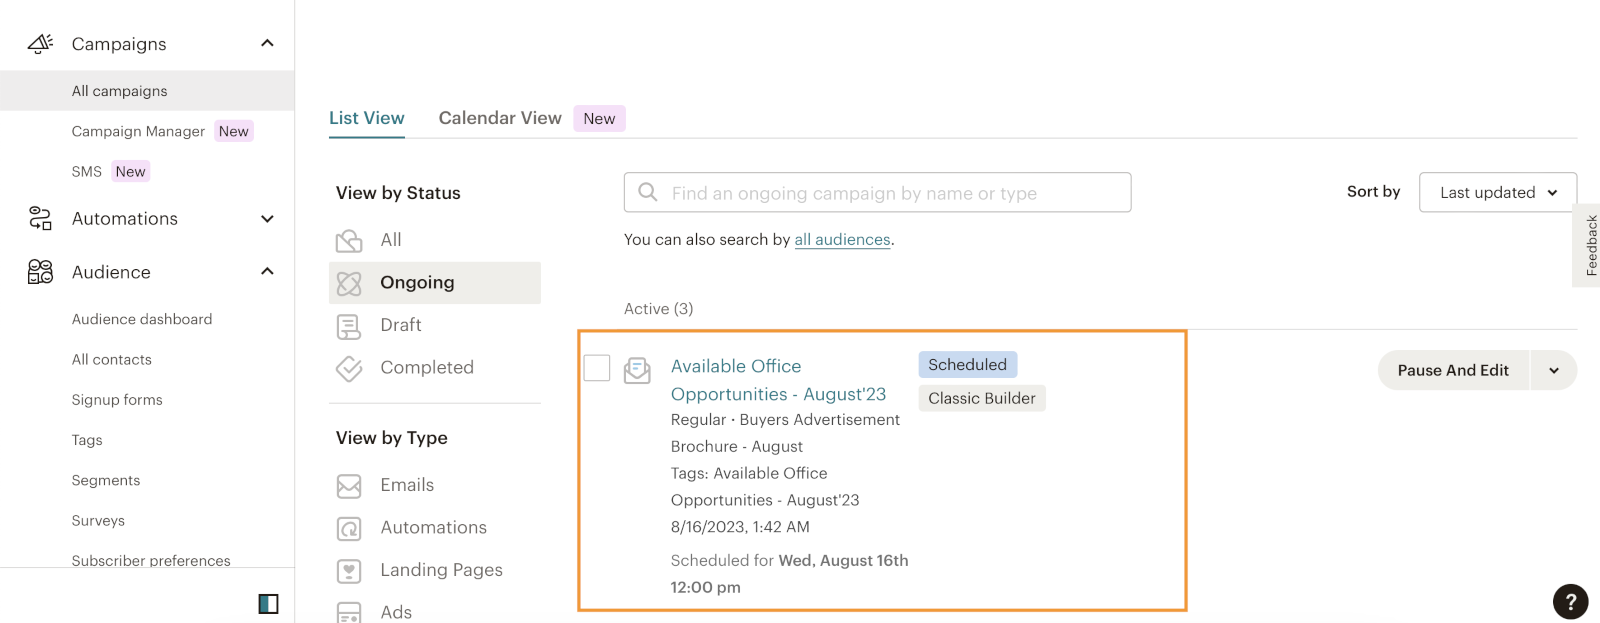
If you click at the notification, you will be redirected to the Mailchimp Campaigns tab with the highlighted email in status – Scheduled.
To pause/cancel Mailchimp scheduled campaign, you can log in to your Mailchimp account and follow these steps:
- Click Campaigns, and then click All Campaigns.
- Click the Pause And Edit button next to the scheduled campaign you want to work with.
- In the Pause Campaign pop-up mode, click Pause to confirm that you want to pause the campaign.
That's it! You are now equipped with the knowledge to effectively schedule your emails using Mailchimp's expanded functionality. If you encounter any issues or need further assistance, don't hesitate to reach out to our support team for help.