Email campaigns mean arranging a series of marketing efforts that are sent via email to multiple people at once to advertise their services, and cover the broker’s need to sell and lease properties online in an active way. The current listing portal allows us to place the information and wait for clients who can find this or that listing via Google search, but this is too dependent on the occasion.
How to start an email campaign
The 1st step is connecting a Mailchimp account. Currently, only this service is available in MarketSpace, so connecting a Mailchimp account is a must to initiate the campaign.
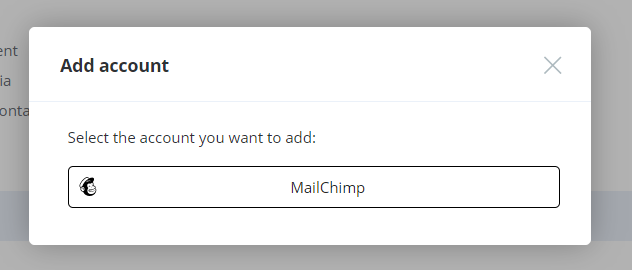
After clicking on the button “Mailchimp“, the user should log in to the Mailchimp account in the opened popup and confirm the allowance of access to the account by MarketSpace.
The 2nd step is organizing contacts into Marketing Lists.
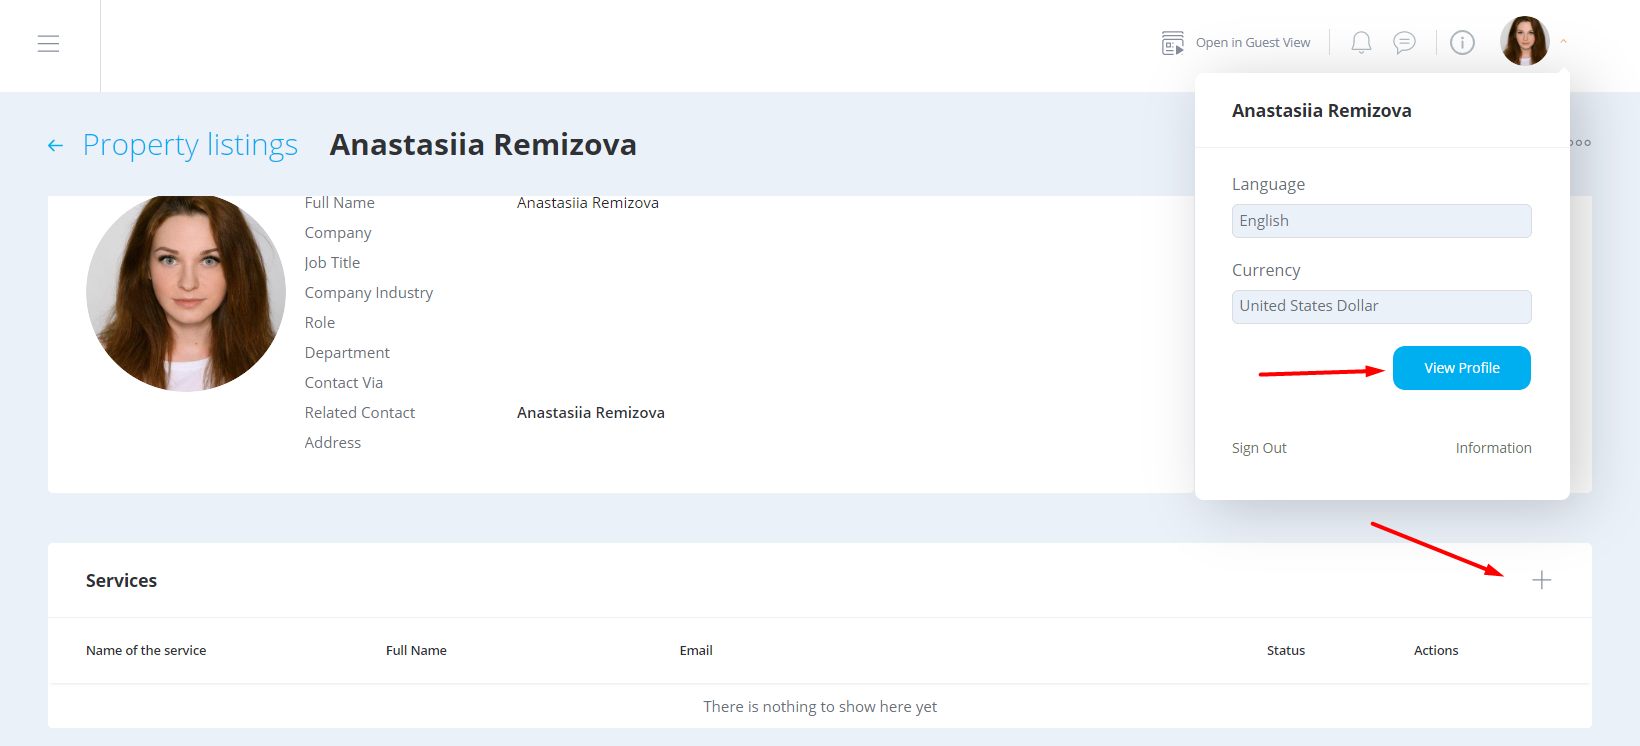
Entry points to start the email campaign
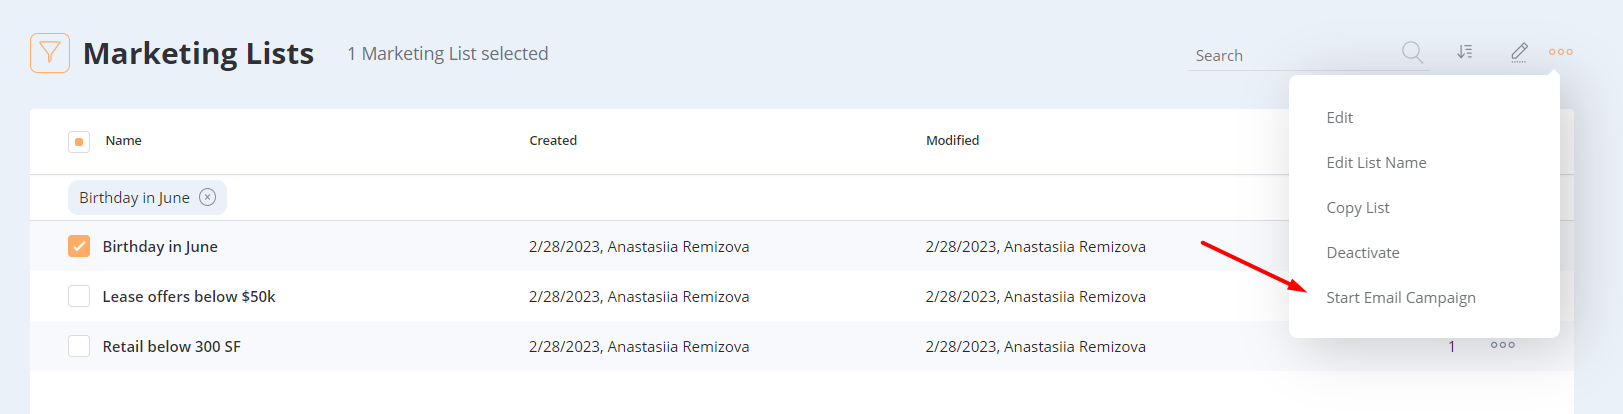
There are 3 options to initiate the email campaign.
- via Email campaign tab: in this case, the campaign will be initiated from scratch, without any pre-filled entities.

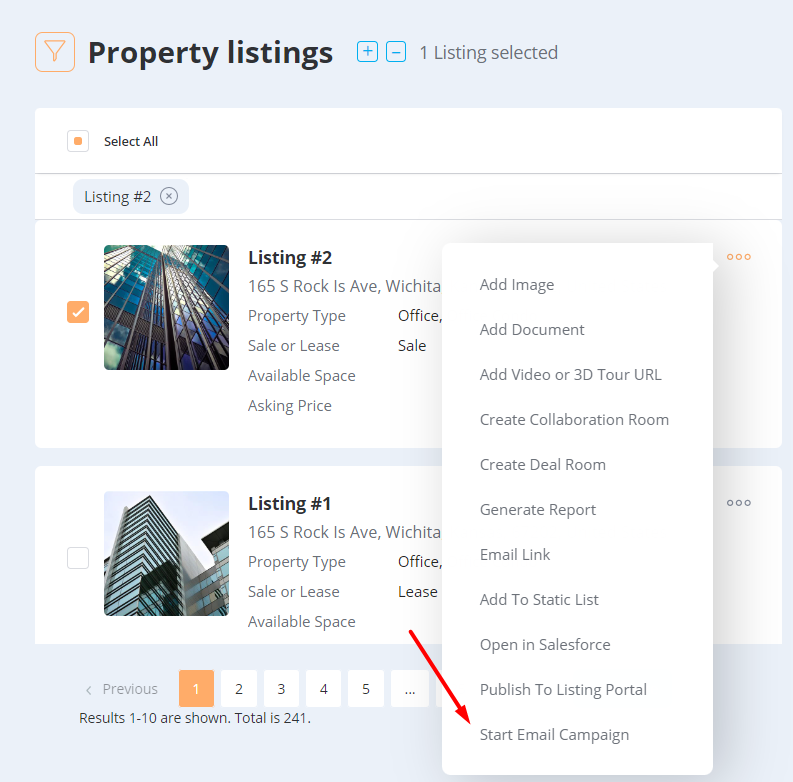
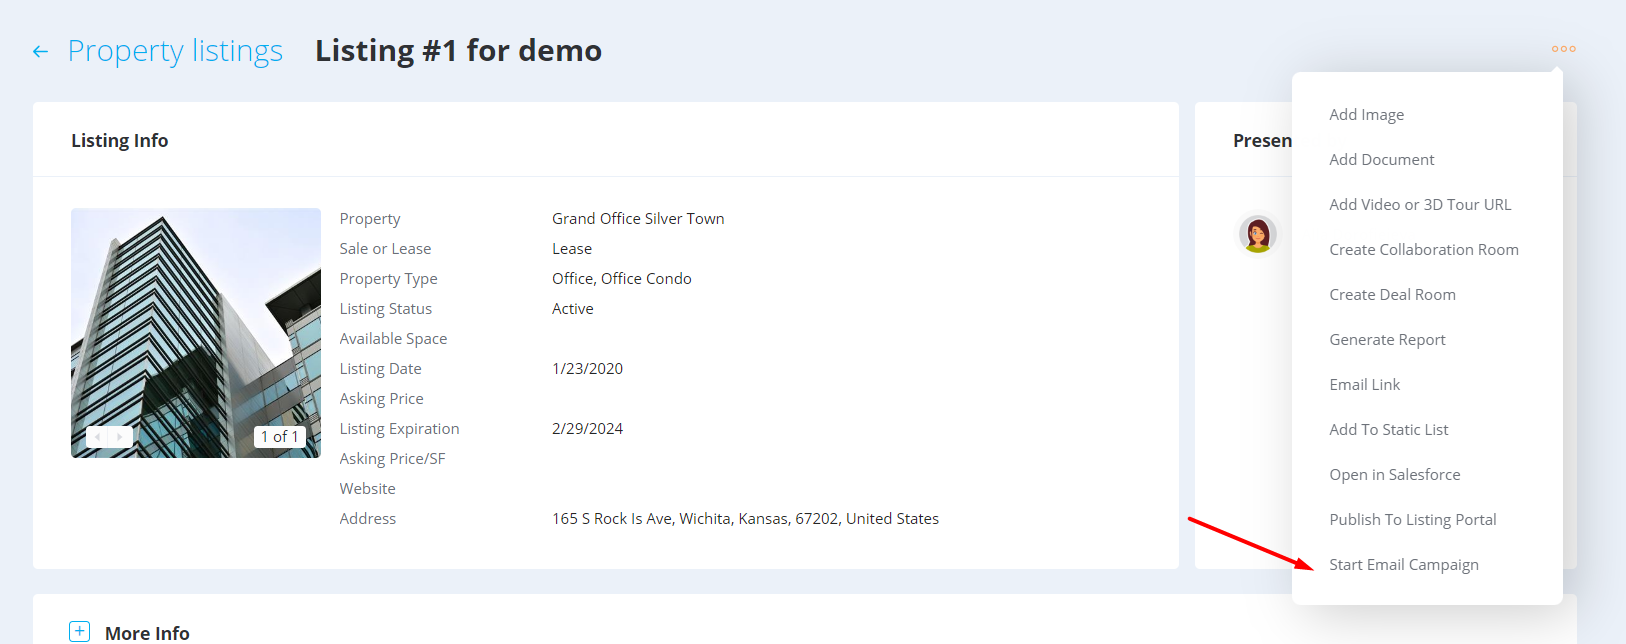
- via Listings tab: in this case, the selected listings will be auto-substituted to the campaign.
- via Marketing Lists: in this case, the selected marketing lists will be auto-substituted to the campaign.
Email campaign wizard
Email campaign wizard is a flow organized into 5 steps that allow creating and launching an email campaign. It has a step counter that allows moving between steps easier and identifies whether the step is passed (with green checkmarks).
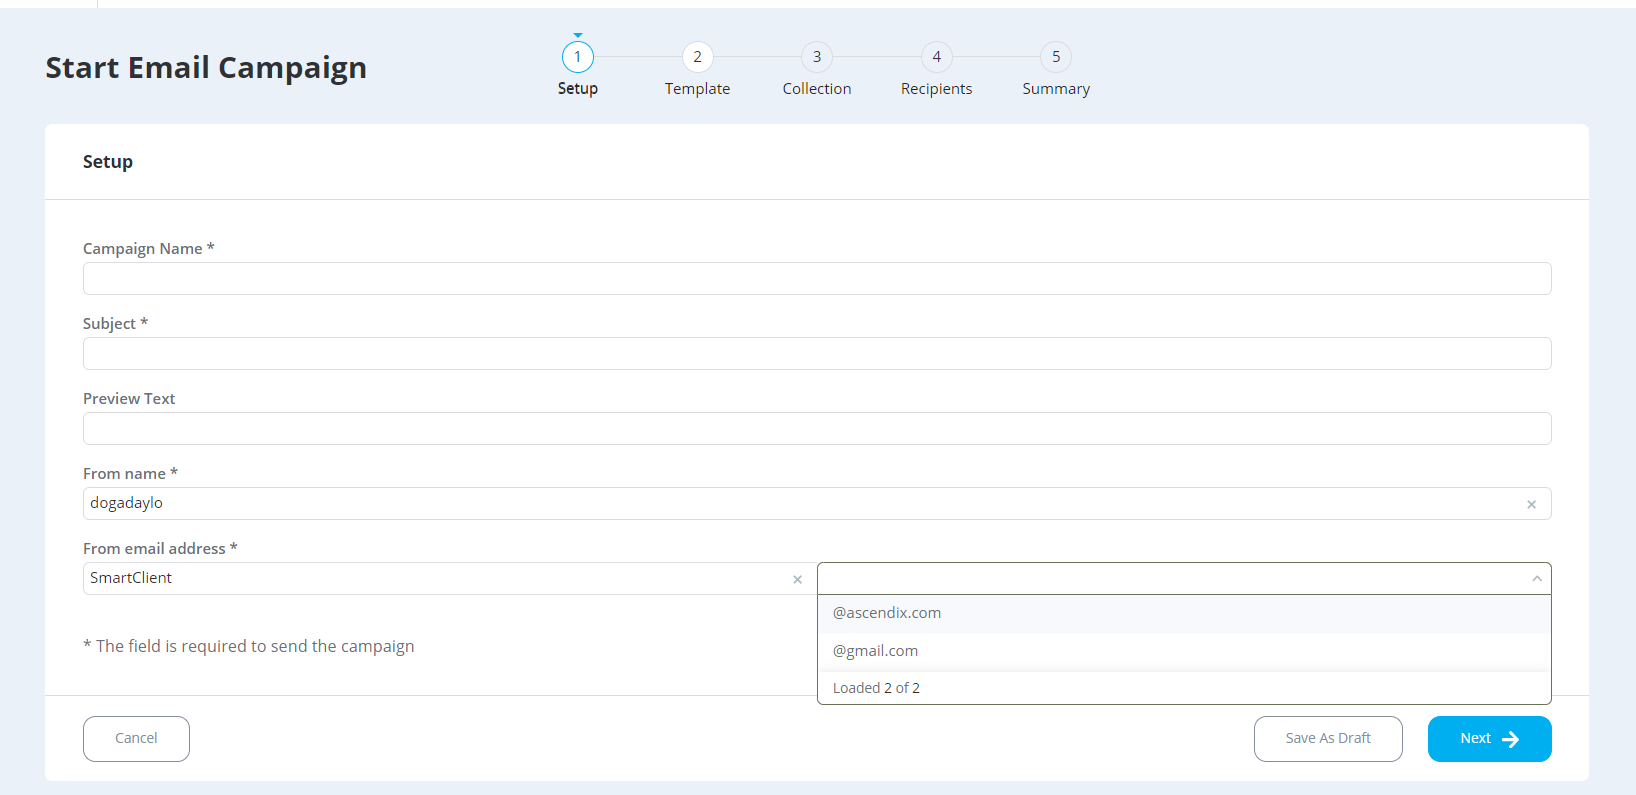
Step 1. Setup
In this step, the user can fill the main information about the campaign like its name, subject, preview text, and the name and email of the sender.
From name and From email are auto-substituted from the connected Mailchimp account. All verified domains are also available. The local part of the email is customized, so the user can send the campaign on behalf of their colleague, etc.
The step is not required to move forward, so this data can be filled in later.
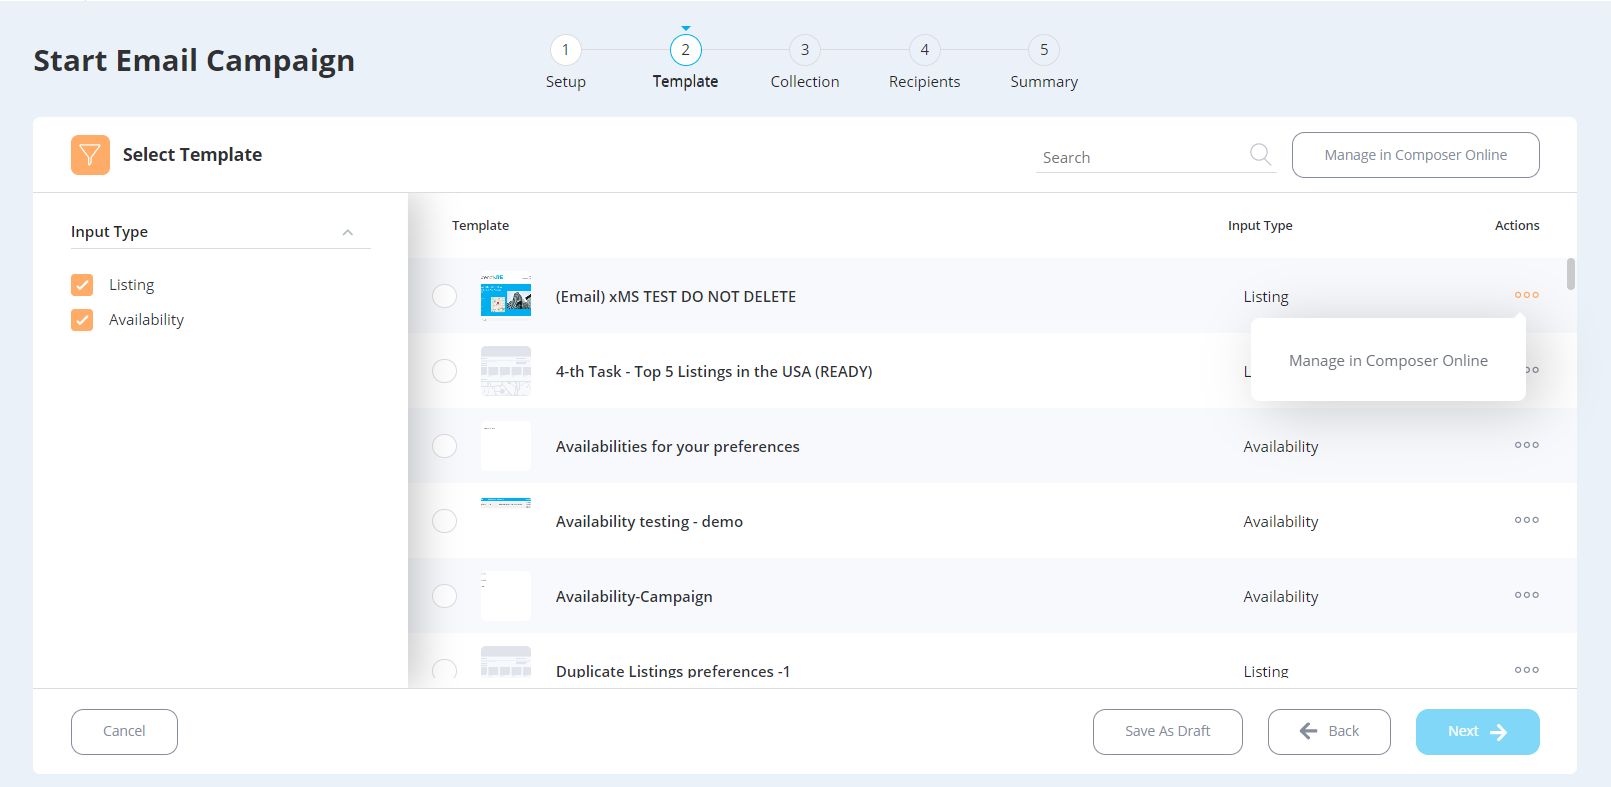
Step 2. Template
In this step, the user can select the template from Composer Online. Only Email templates built on Listing and Availability collections are displayed. Only 1 template can be used per campaign. This step is required, so the future steps are kept locked until the user selects the template.
The user can click on Manage in Composer Online, and the main page of Composer Online will be opened in the new tab. By clicking on Manage in Composer Online in front of a particular template will open this particular template in Composer Online. In case, the user has a role Editor, they will see the “View in Composer Online“ option, and the template will be opened but cannot be modified (since this template was published for the organization but the Editor does not have rights to edit it.
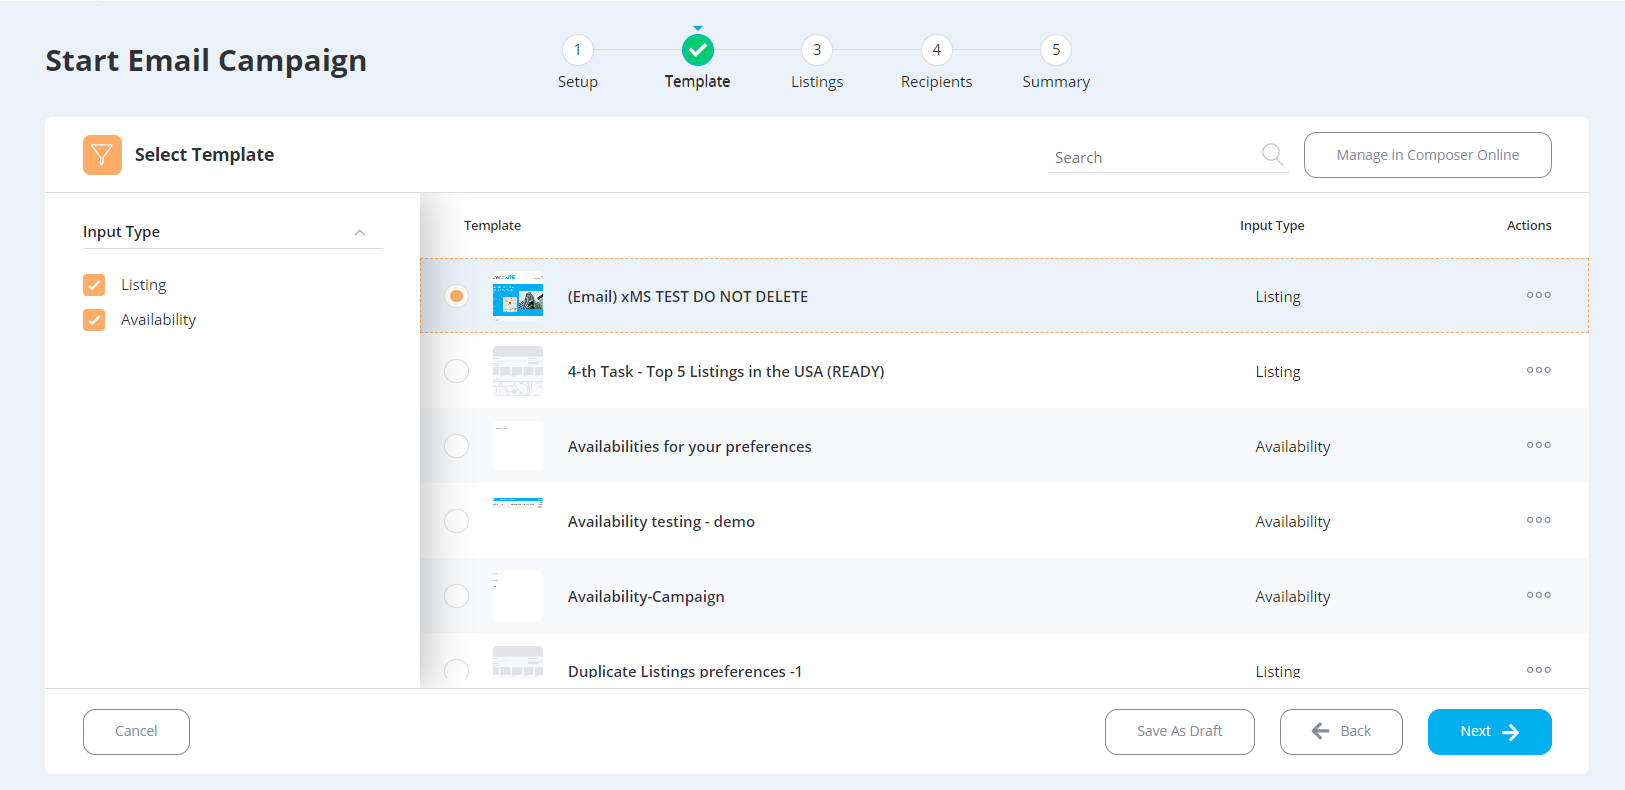
Since the template built on the Listing collection was selected, the 3rd step name was updated to “Listings“. For the case with Availability collection, it would have the “Availabilities“ name.
Step 3. Collection
This step looks like the Listings tab in MarketSpace. Here the user should select the listings to use in an email campaign. The number of availabilities cannot be adjusted. If the selected template contains the fields bounded to Availabilities, the data about all availabilities within the selected listings will be grabbed by the report. If the selected template does not contain anything related to the collection “Availability“, their number does not matter.
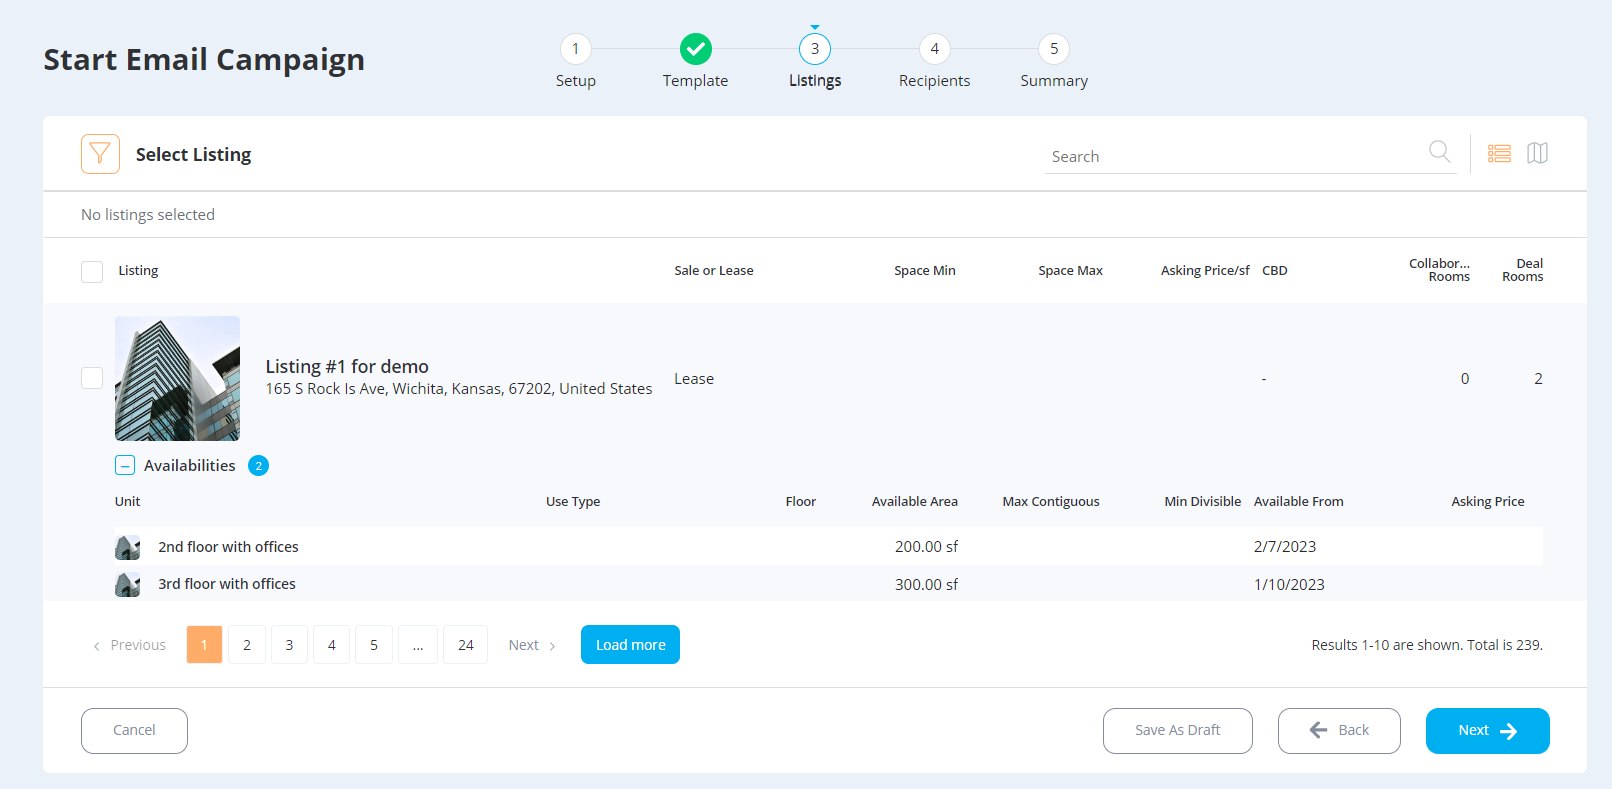
If the template type is “Availability“ (it was built on such a collection), the number of availabilities can be adjusted and only selected availabilities will be used in the report.

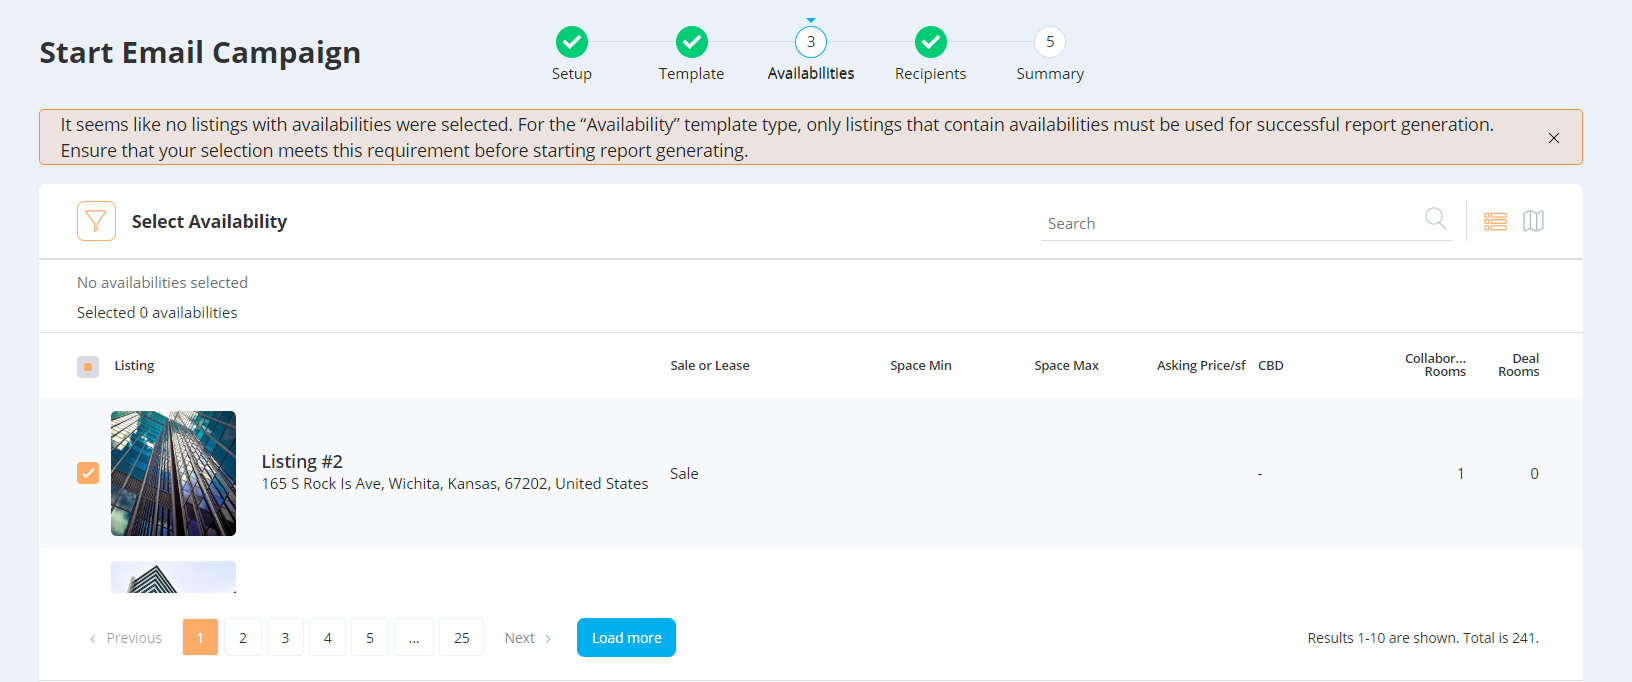
For the case when the Availability-type template is selected and no listings with availabilities are selected, the user can see the notification about it which means that no report can be generated (no points to generate it). In this case, the step is not recognized as “passed“ despite the fact the item(-s) is selected.
If the user changes the type of the template when at least 1 item on the Collection step is selected, the corresponding notification will be displayed:
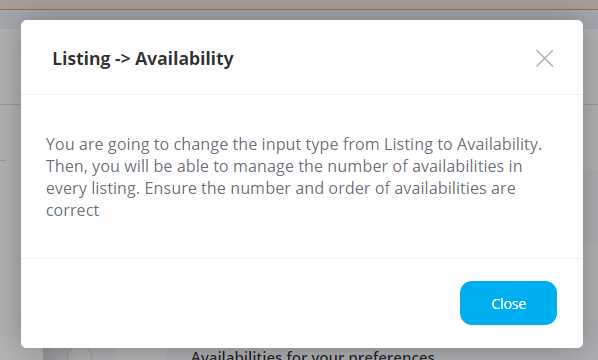
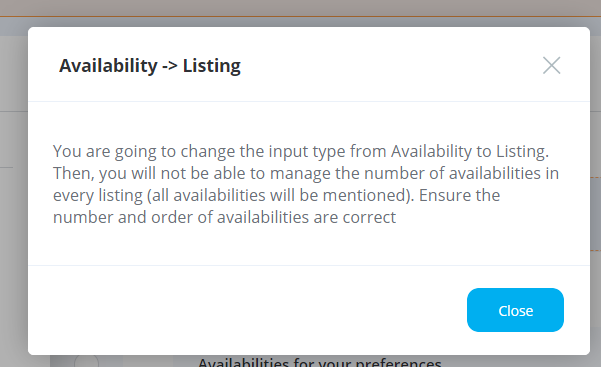
It indicates that the change in the type may influence the resulting report.
For Listing → Availability change it does not make much sense since the Listing-type template grabs all the related availabilities anyway, and now this number can be adjusted.
For Availability → Listing change is important since the custom selection of availabilities will be “reset“ and all the related availabilities can be grabbed to the report (if the fields of Availability collection were used for the template).
If the user has a selection of items (listings or availabilities) and changes the type of the template, but then changes their mind and returns to the previous type of the template, the selection will be saved.
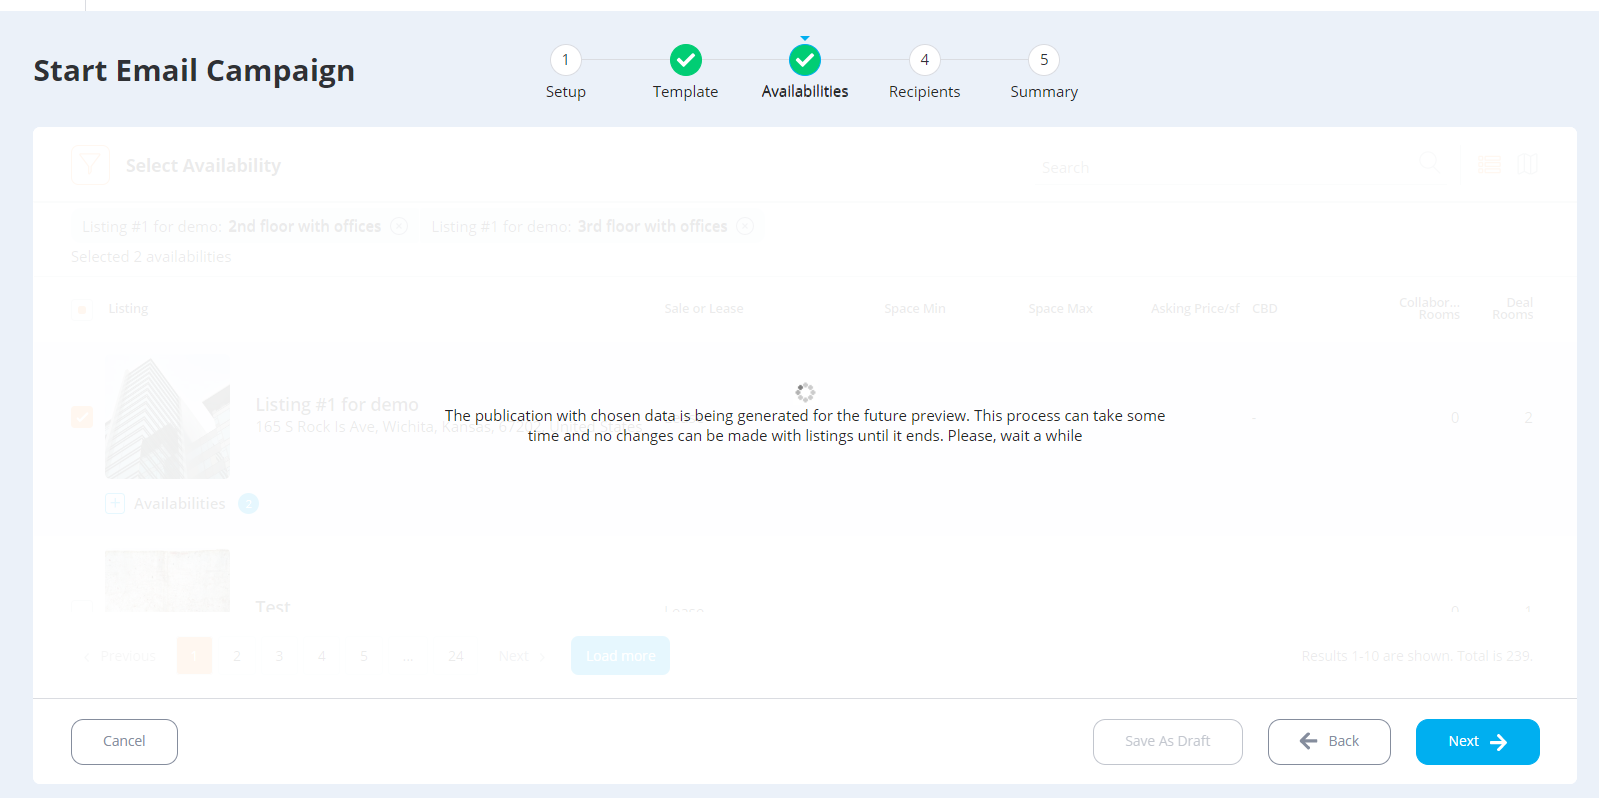
Trigger the report generation
Once the user selects a template and items in the collection (listings or availabilities) and moves to the next step, the report generation is triggered. During this process, the user cannot make any edits related to templates and listings/availabilities as well as save a campaign.
Every new report (triggered by changing either template or collection items) replaces the previous one in the email campaign wizard, but all of them are stored in Composer Online. There is no option to call the previously generated report if a new one was generated after - only generate the required report by reproducing the same conditions (template + listings or availabilities). Once the user saved the campaign as a draft or sends it, the lastly generated report is assigned to the current campaign, and all other reports that were generated within it are removed from Composer Online.
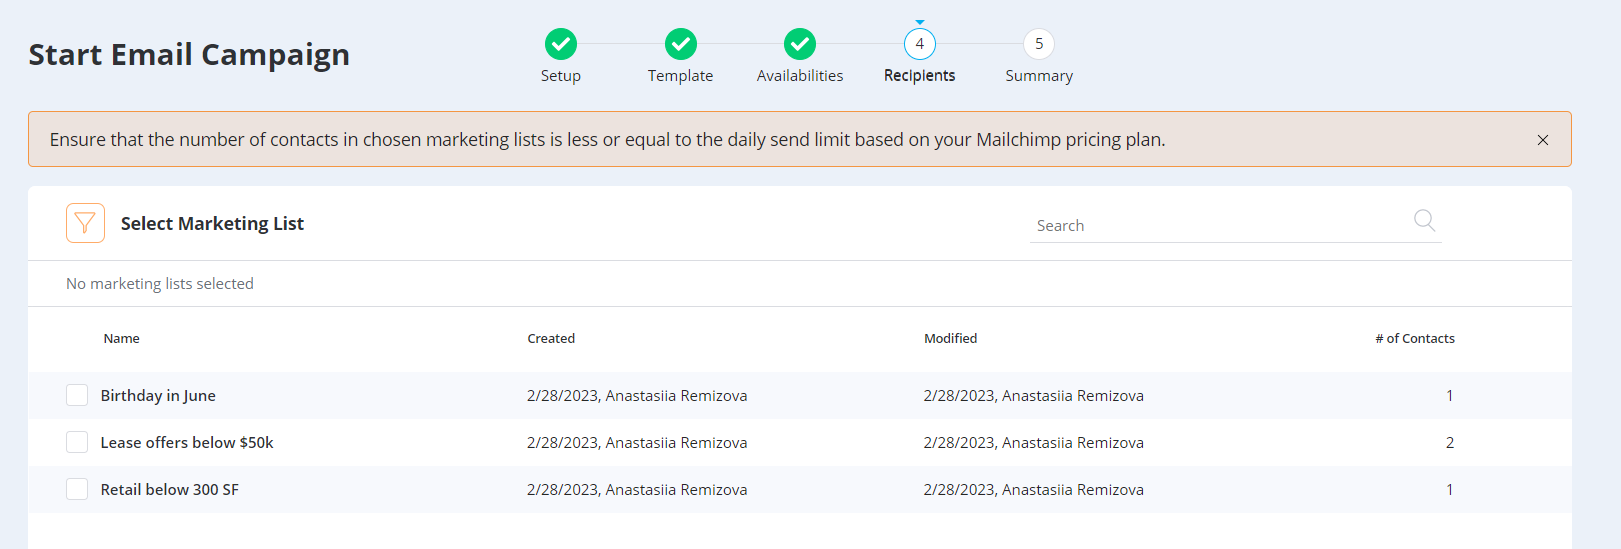
Step 4. Recipients
In this step, the future recipients can be selected. This page imitates the Marketing Lists tab with the list of available MLs.
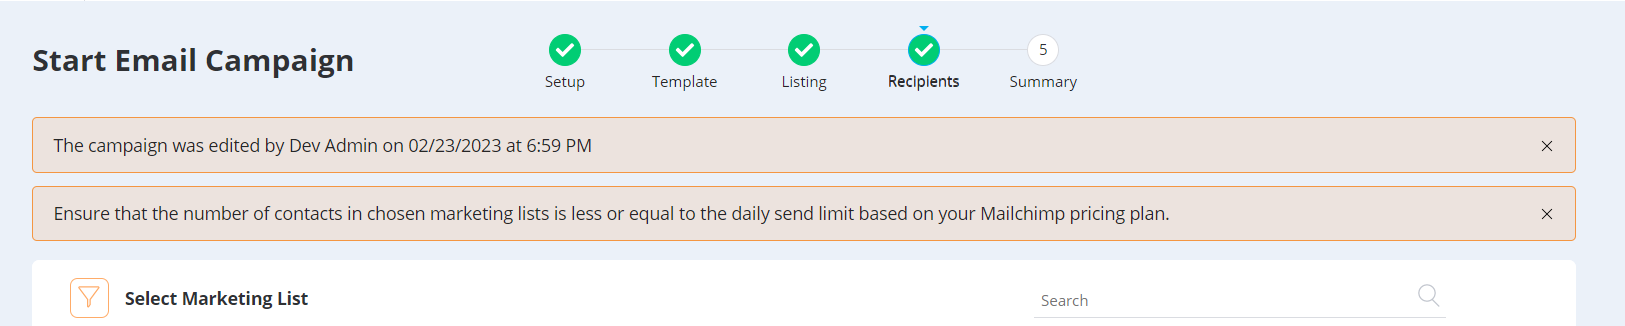
By default, the user can see the notification to ensure that the number of contacts in the selected Marketing Lists fits the available recipients in the user’s Mailchimp pricing plan. Mailchimp API does not share this information with our API, and we cannot display it in the email campaign wizard.
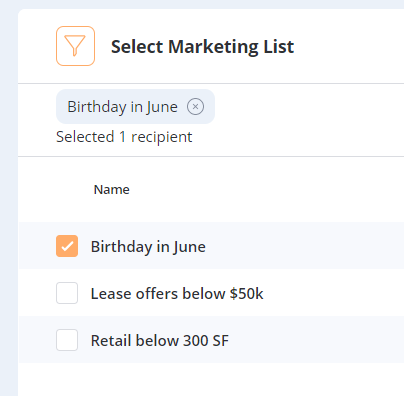
The total number of recipients is displayed above the list of them.
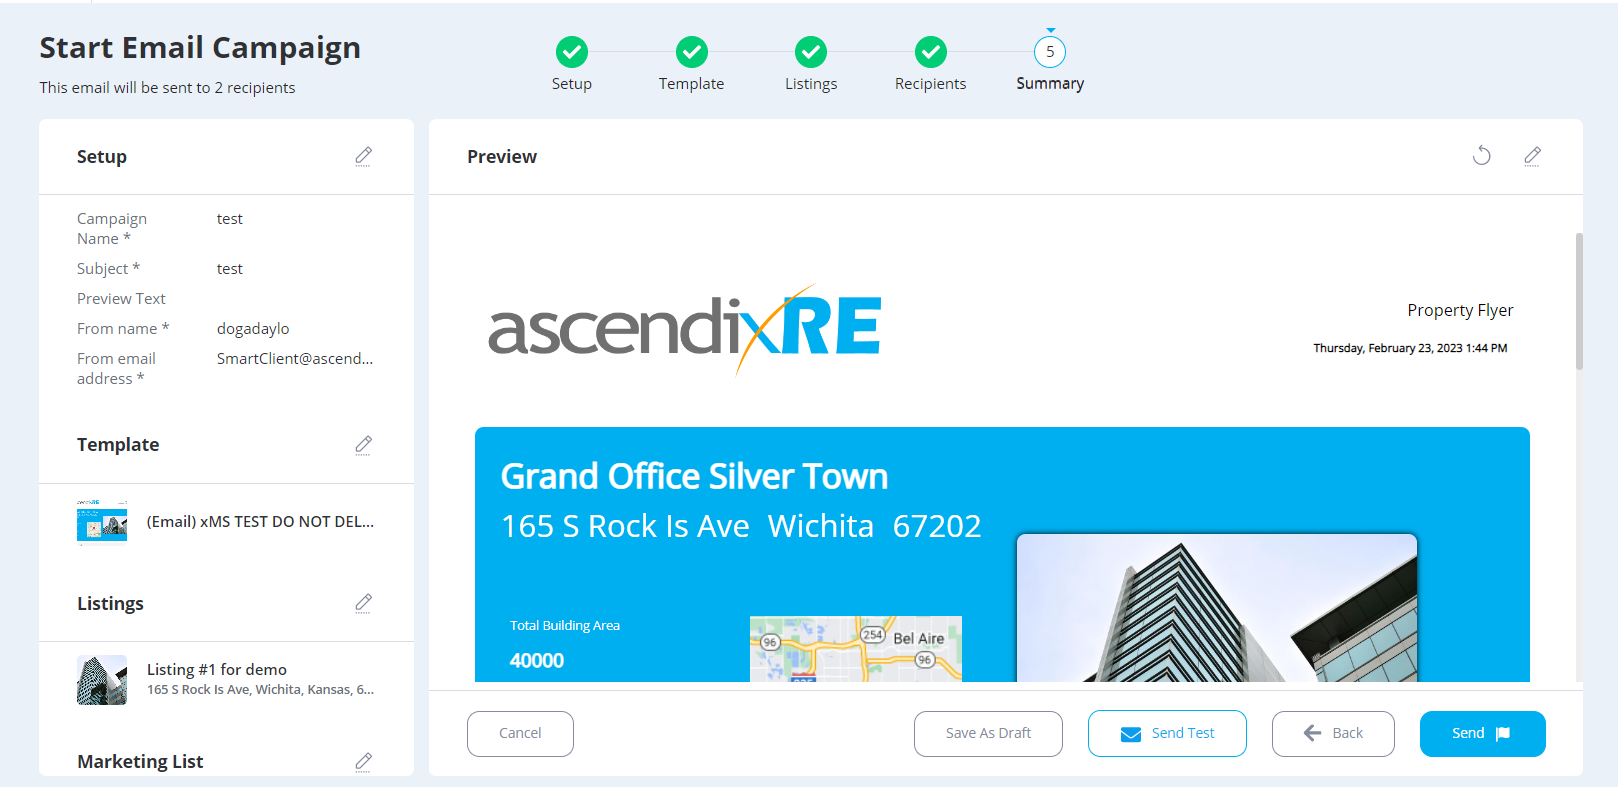
Step 5. Summary
In the 5th step, the user can ensure that the selected data for the campaign is valid. On the left sidebar, there is the info collected from the 1st - 4th steps, and in the Preview area, the generated report is displayed. By clicking on the “edit“ icons, the user will be redirected to the corresponding step.
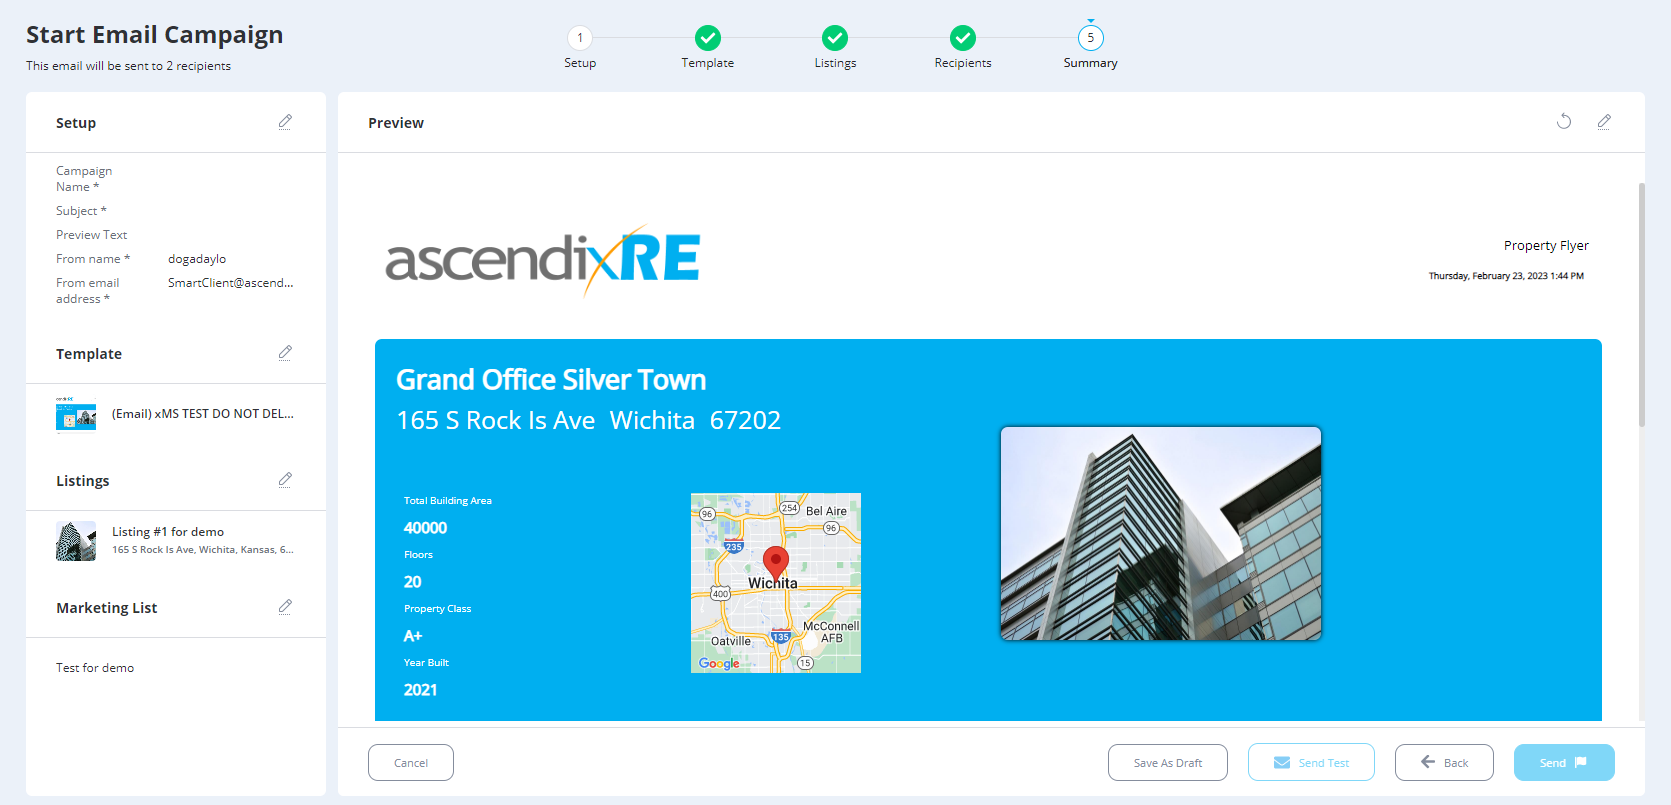
Until all the required fields are fields, the campaign cannot be sent. Once all 4 steps are passed, the user is able to send the campaign as a usual campaign or as a testing campaign. The testing campaign can be sent only before the campaign is launched.
After clicking on the Send Test button, the popup is displayed:
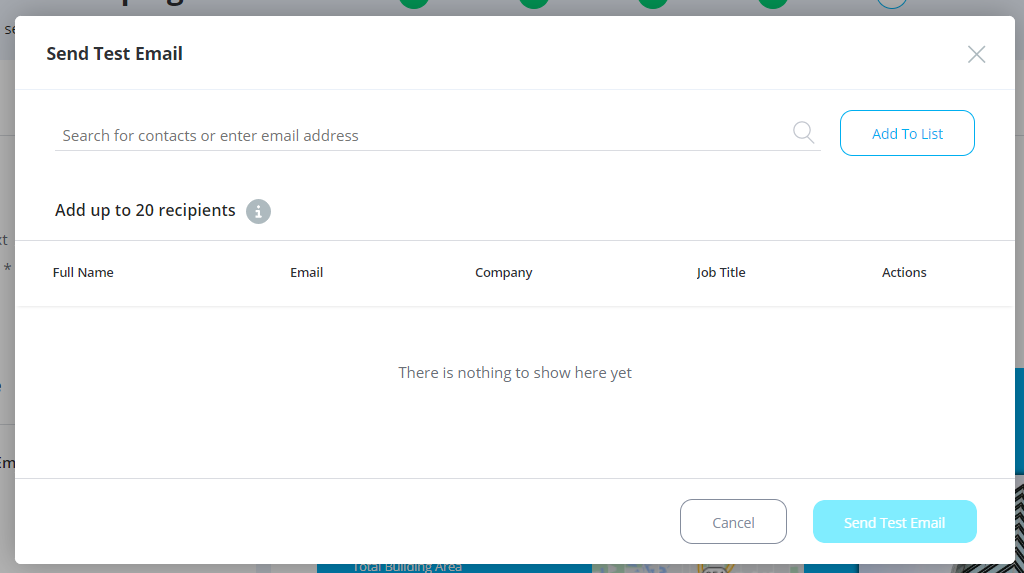
The user can add any email to the list of recipients: personal, corporate, colleague’s emails, etc. If the contact with such an email exists, the application will suggest selecting this contact; if not - the email will be added to the list without the name determination.

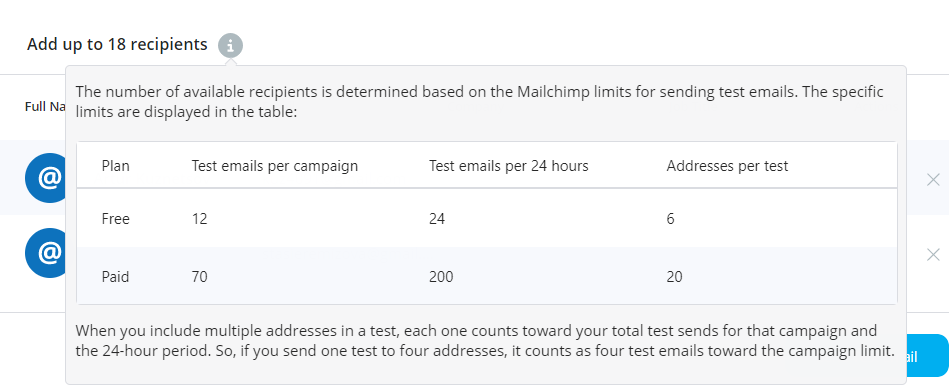
The limit of available recipients for the testing campaign is calculated based on the Mailchimp logic.
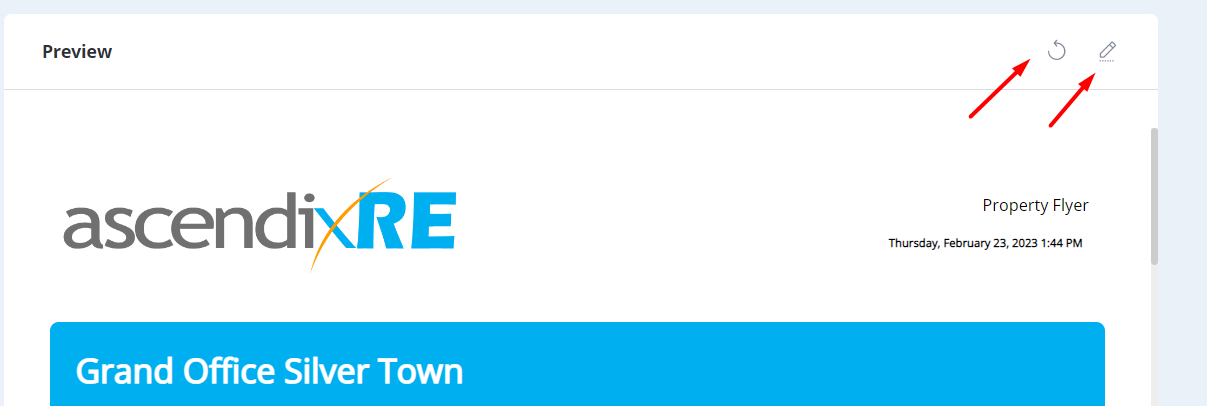
The generated report can be edited. The user can click on the “edit“ button and the report will be opened in Composer Online in a separate tab. Once the edits are done and saved, the user can click on the “update” button, so the changes can be grabbed to the email campaign wizard.
Save as draft
The campaign is not automatically saved in MarketSpace, and the user can do it manually by clicking on the Save as Draft button. After this, the campaign will be closed and opened again from the step where this button was pressed. Saving as draft triggers removes the previously generated reports within a campaign and saves the last one. Such a campaign has a status “Draft“. The drafts are saved on the MarketSpace side and are not shared with Mailchimp (cannot be found in the Mailchimp account outside MarketSpace).
Send the campaign
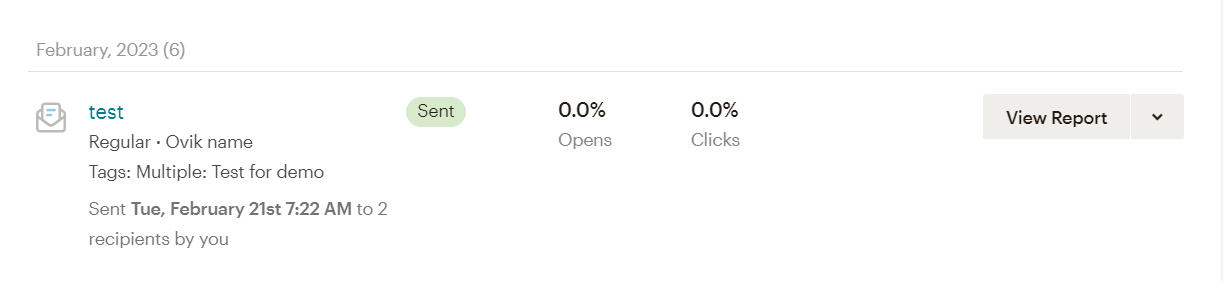
Once the user presses Send, the campaign is sent to Mailchimp and gains the status “Sent“. It can be found in the Mailchimp account now:
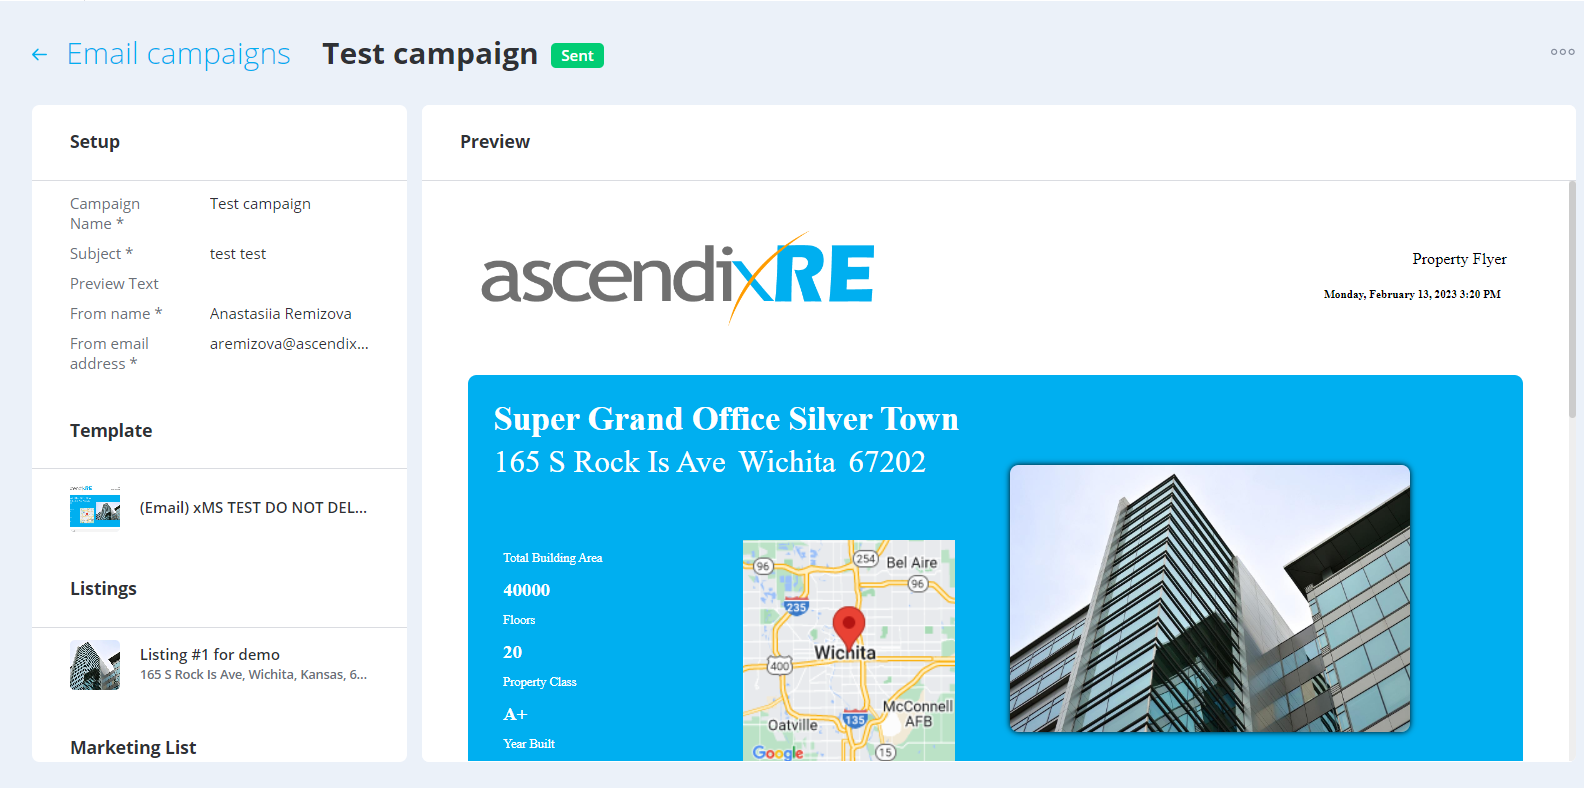
In MarketSpace, the campaign looks the same as the 5th step, but no step counter and control buttons are available:
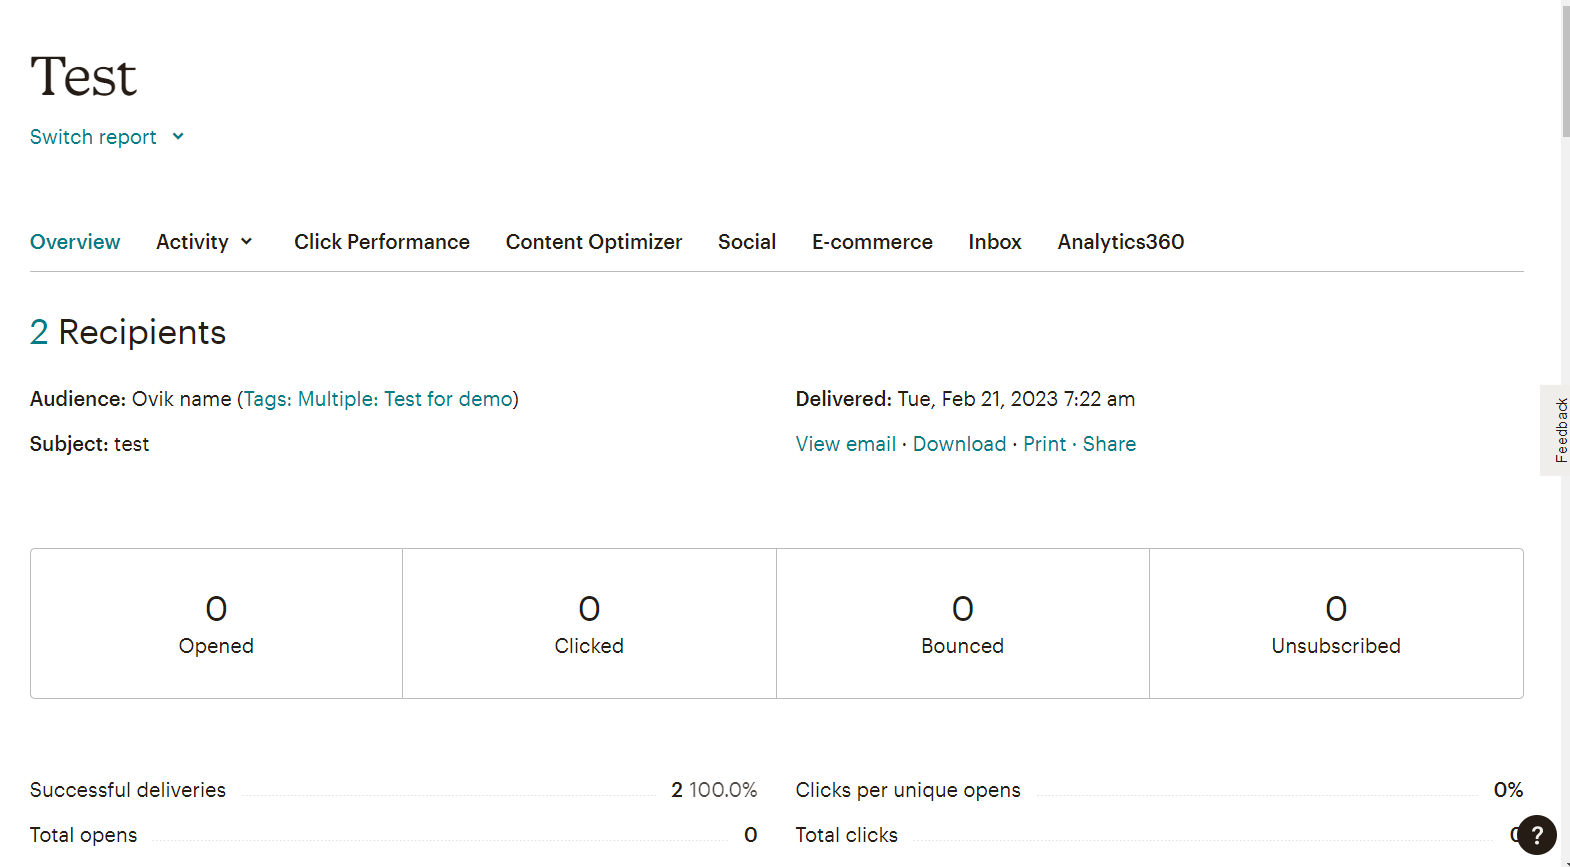
The user can open the Statistics of the campaign by clicking on the action menu → Open Statistics. They will be redirected to Mailchimp:
Error handling in the email campaign wizard
1. Removed artifact
If the generated artifact was removed in the background (by the user or the Admin who has rights for this), it is not a big issue since it can be regenerated.
For drafts: after opening the draft, the user will see the notification:
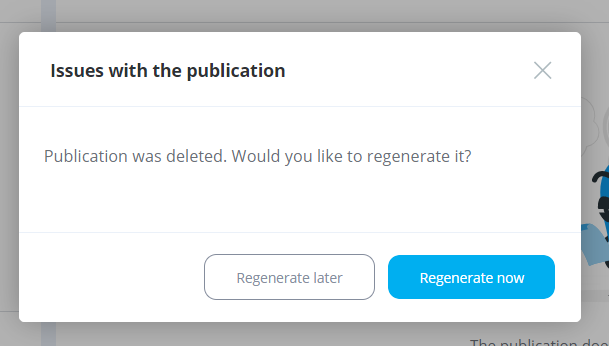
If the user selects “Regenerate now“, the report’s generation starts immediately. If the user presses “Regenerate later“, they can review the campaign and regenerate the report later by clicking on the button on the 5th step, or by selecting new conditions for the report (template and/or listings/availabilities).
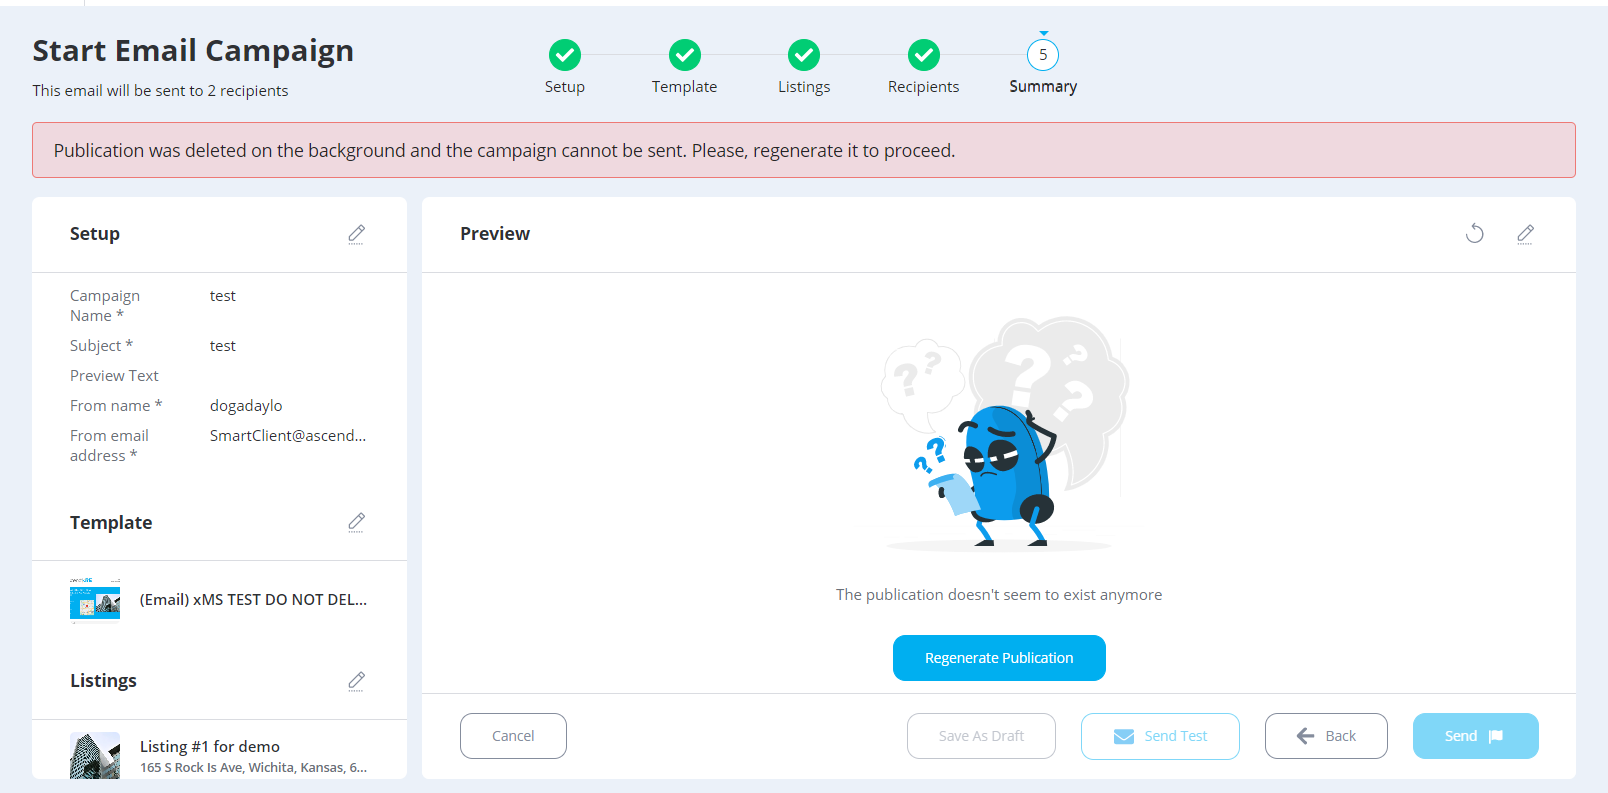
For usual flow: the same flow but the lack of the report will be recognized once the user presses Send.
2. Removed template
This case does not block sending of the campaign since the report was already generated and can be used. The 2nd step remains marked as “passed“, however, the notification about the template deletion is displayed there:
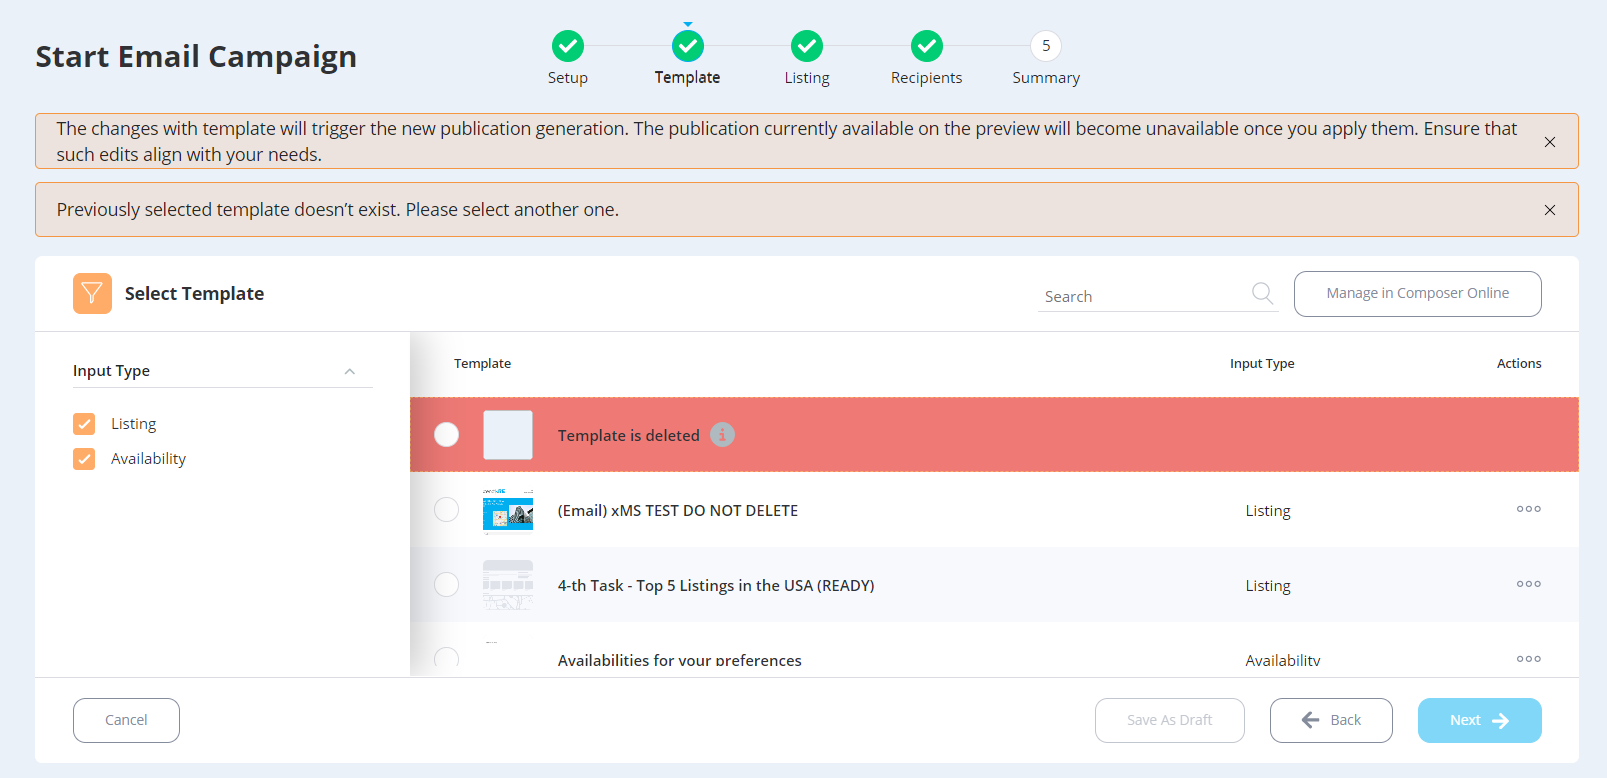
If the user selects a new template, it will trigger new report generation without the opportunity to return to the previous one in the email campaign wizard.
3. Deactivated listings/availabilities or marketing lists
If the user removes the listing/availability in SalesForce or deactivates the Marketing list in MarketSpace and sends the campaign, the popup will be displayed:
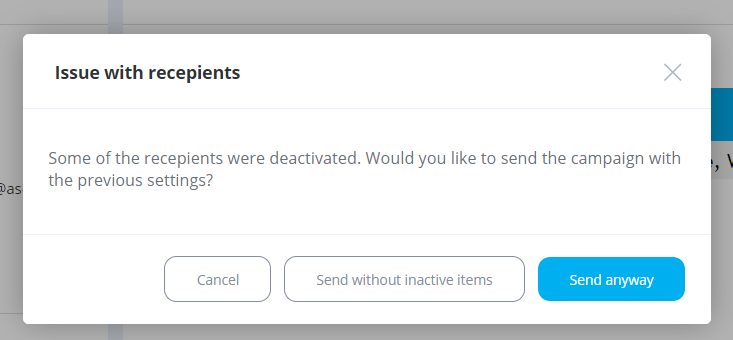
The user has 3 options:
- cancel sending and manually handle the issue;
- send the campaign without inactive items. In this case, the campaign will be sent but all inactive items will bi filtered;
- send anyway. In this case, the campaign will be sent with inactive items too.
4. Updating of the campaign by Admin (or another user with the relevant right)
If any user who has access to the owner’s campaign, edits it, and the owner of the campaign opens this campaign, they will see the notification about some edits made:
Campaign deletion
1. Drafts. Since drafts are saved on MarketSpace’s side, they can be easily deleted by the user with the relevant rights and no 3rd party applications are involved.
2. Sent campaigns.
- if the user, who deleted the campaign, was logged in to the Mailchimp account from where this campaign was sent, the campaign will be deleted in both Mailchimp and MarketSpace;
- if the user, who deleted the campaign, was not logged in to the Mailchimp account from there this campaign was sent, the campaign will be deleted in MarketSpace only, and will remain available in Mailchimp. It can be removed only from Mailchimp’s side now;
- if the user manually removed the campaign from Mailchimp, it will remain available in MarketSpace (no backward compatibility is set between the applications). It can be removed from MarketSpace’s side manually.