The admin can add languages for translation, assign translators for each language, and activate or deactivate a language’s translations for each user. 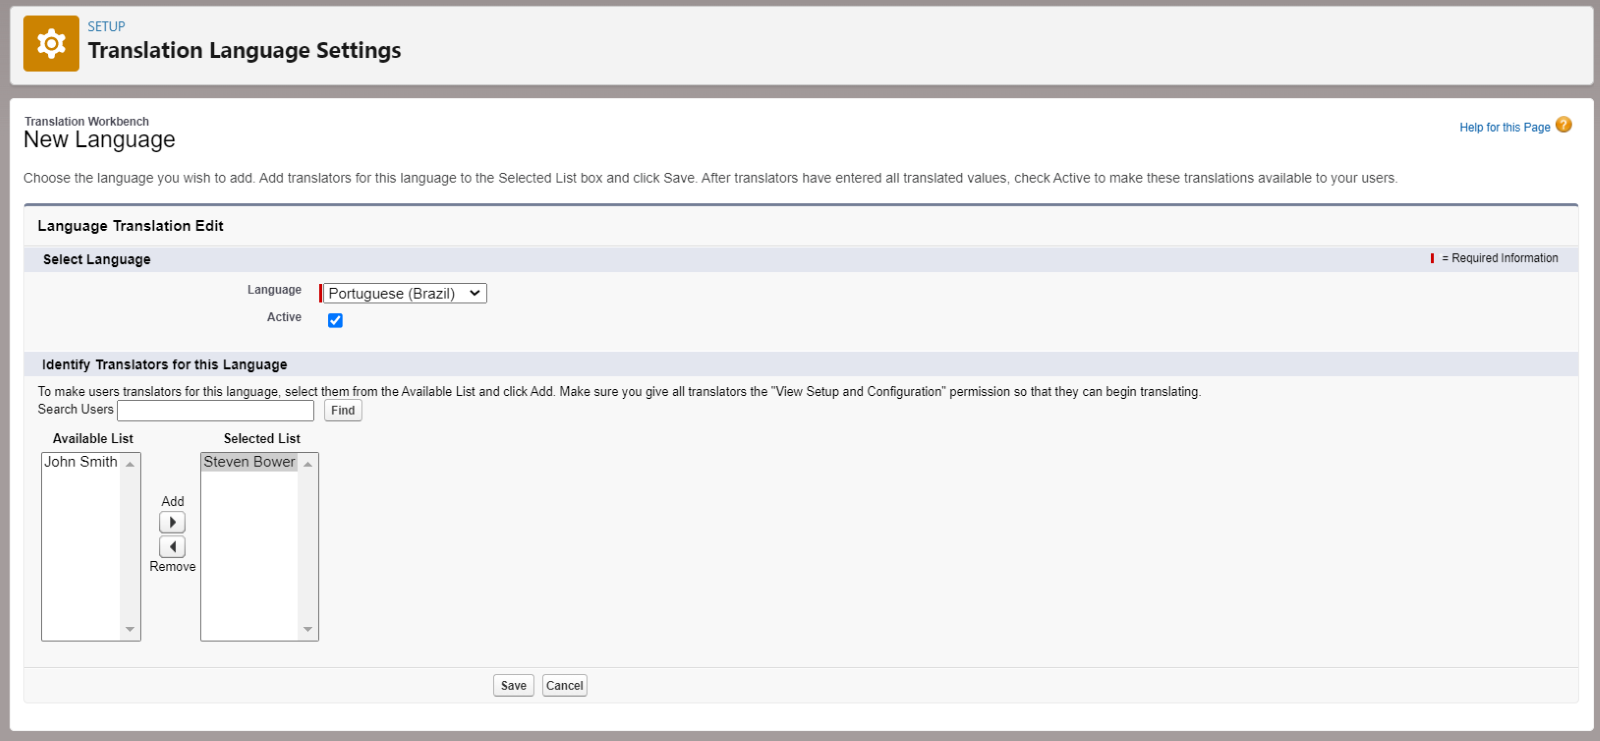
The standard objects/labels and buttons will be translated automatically, although the custom objects/labels/ buttons will remain the same. So, to avoid confusing the standard user, the admin can configure the language of the UI labels for the custom objects so that any user can use the language depending on the region with the help of custom labels.
Overall, the Custom labels enable developers to create multilingual applications by automatically presenting information (for example, help text or error messages) in a user’s native language. Custom labels are custom text values accessed from Apex classes, Visualforce pages, Lightning pages, or Lightning components. The values can be translated into any language Salesforce supports.
To access this configuration, follow these steps:
Step 1. Navigate to the Setup and click the gear icon.
Step 2. In the Quick Find box, enter Custom Label, then select Custom Labels:

Step 3. Let’s create the list view for Property object. To do that click the Create New View and fill in the steps from 1- 4: 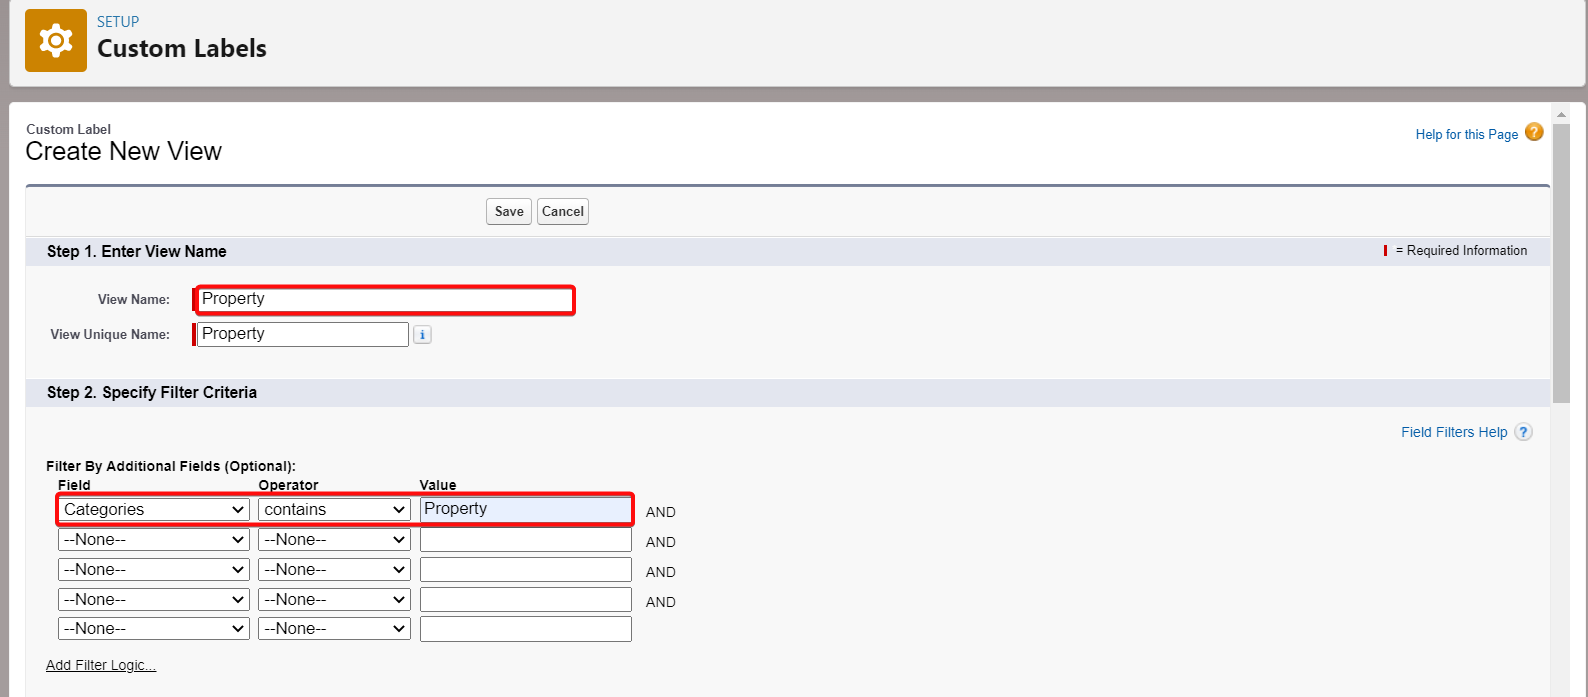
Step 4. Fill in the Name for the list view – Property; the Unique Name will be filled in automatically.
Step 5. In Specify Filter Criteria section select: Field - Category, Operator - contains, Value - desired object Name ( Please note: We are supporting four objects for now: Deal, Property, Listing, and Inquiry objects).
Step 6. Select fields to display in step 3 and restrict visibility in step 4. 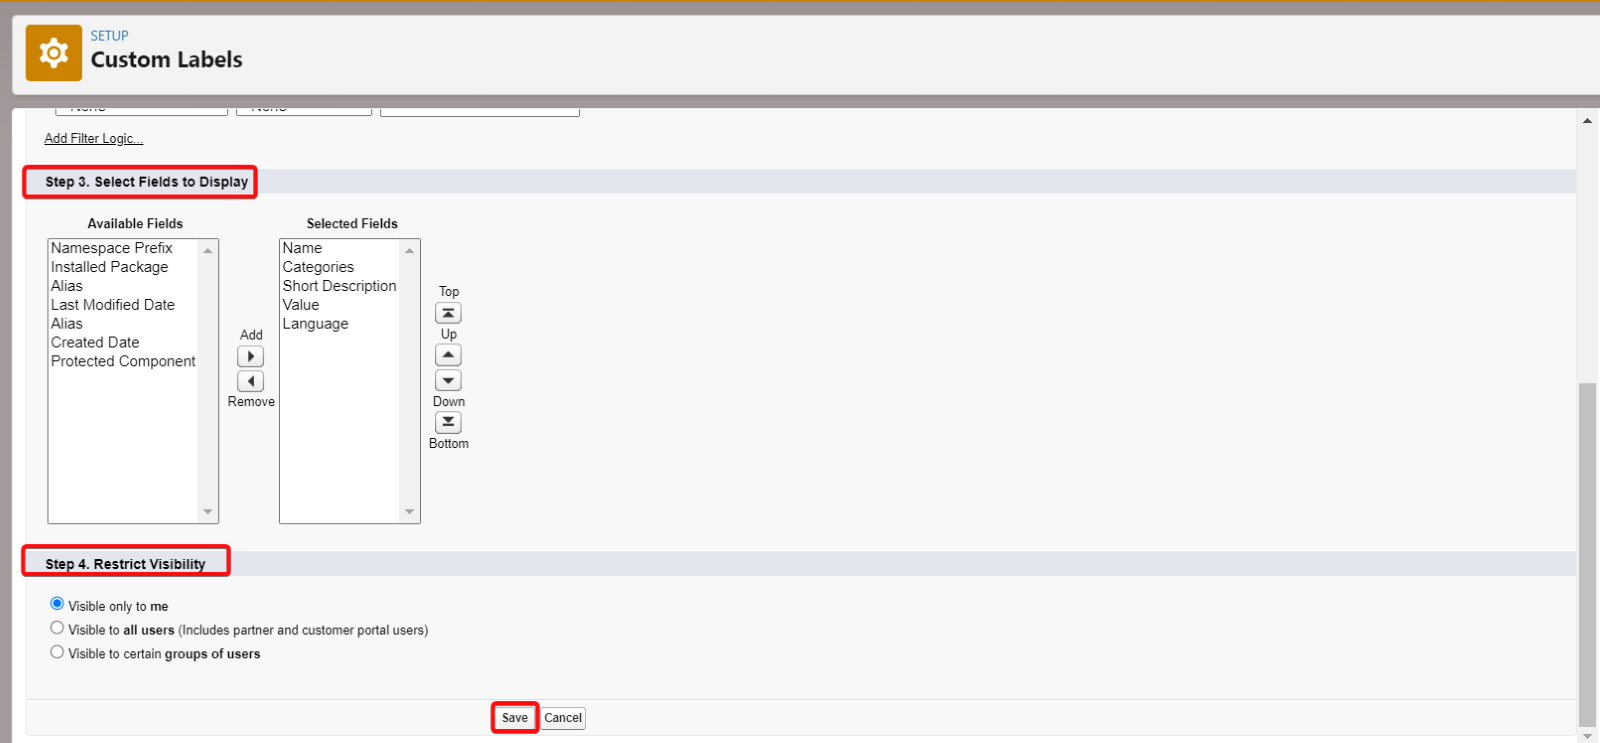
Step 7. Click the Save button.
Now let’s create the new translation for the custom “LabelSave”:
Step 1. Select the list view Property and hit the LabelSave: 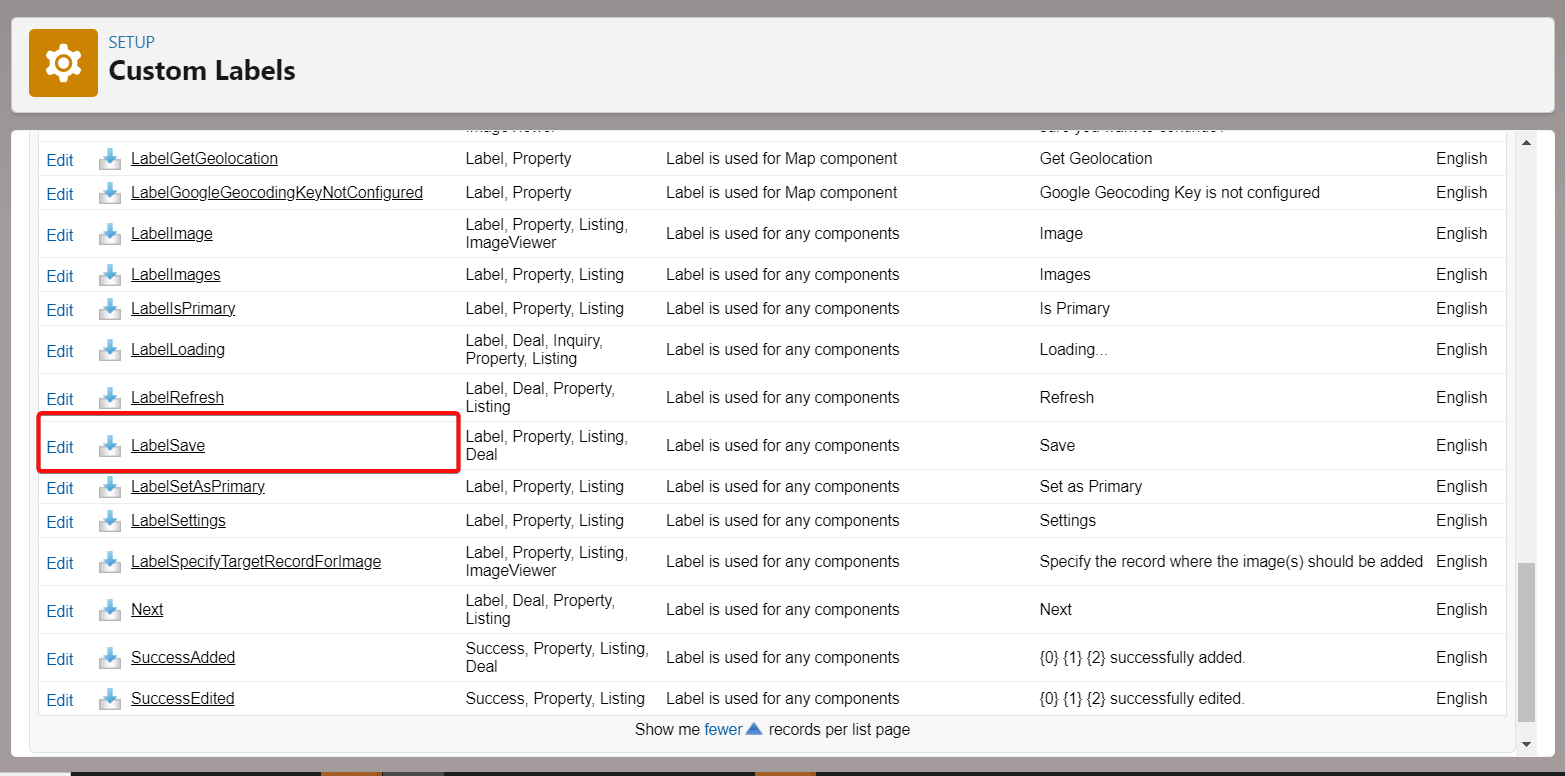
Step 2. Click the New Local Translations/Overrides button: 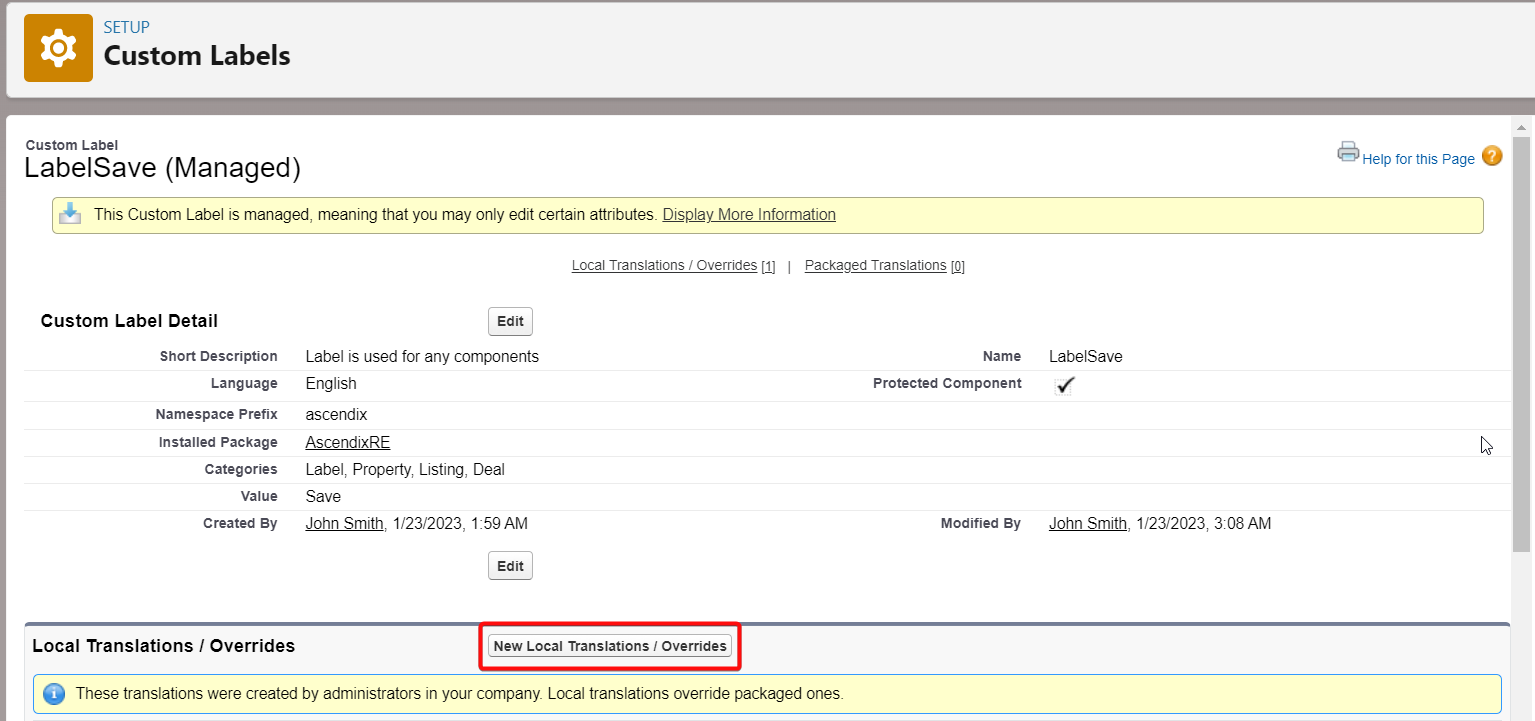
Step 3. Select the language from the picklist field (Portuguese) and write the translation text (Guardar):
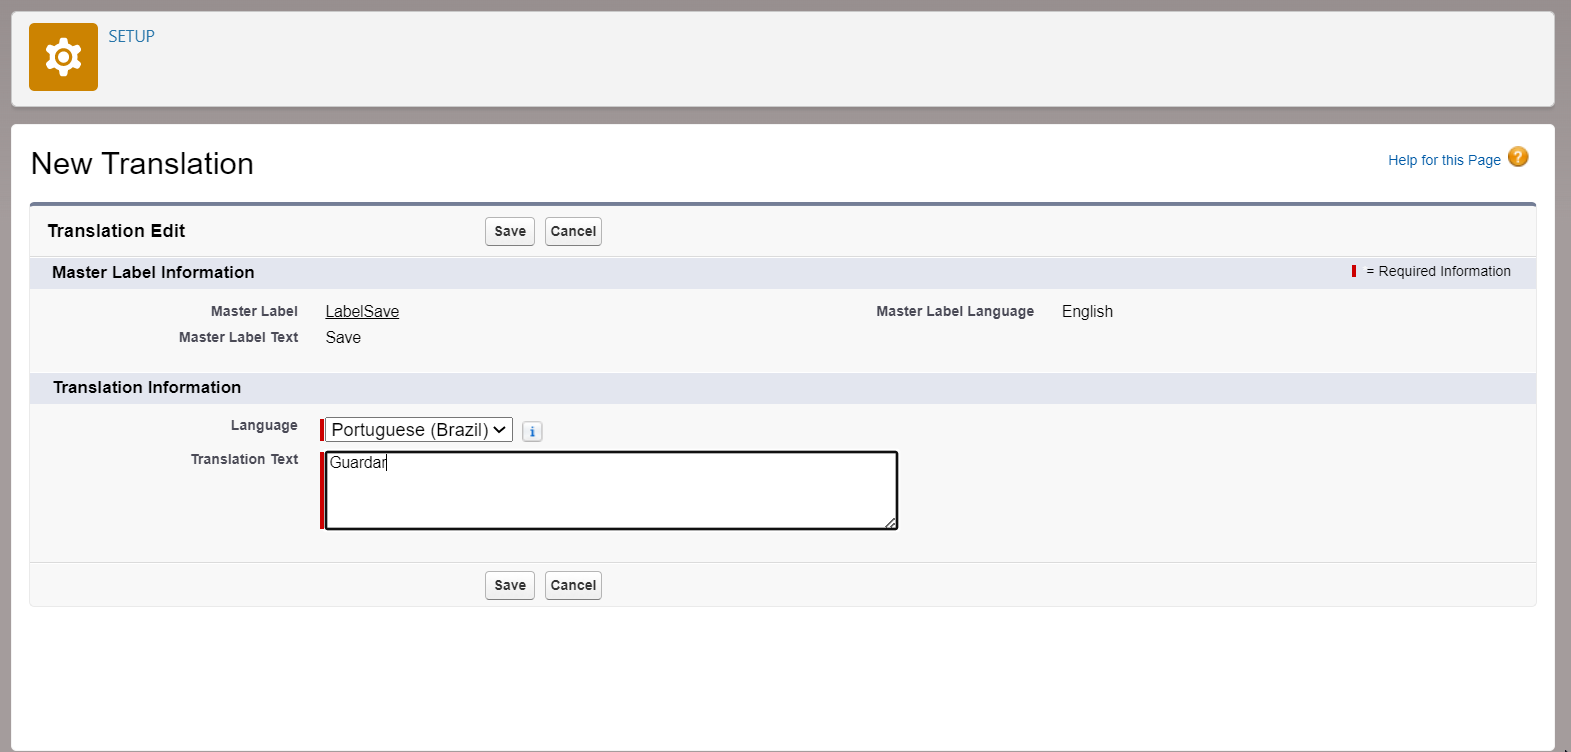
Step 4. Click the Save button.
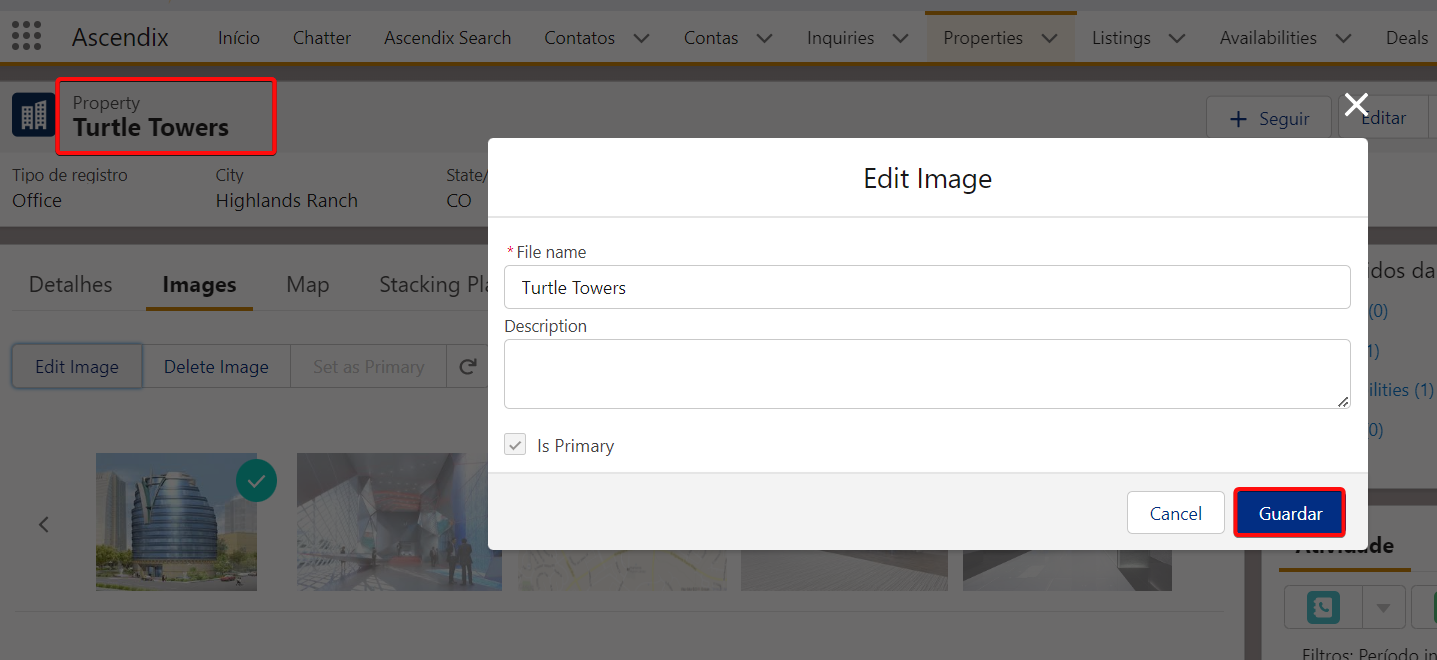
Now, we can log in as Steven Bower – a standard user and test our language changes.
As we can see, our button Save is translated successfully to Guardar:
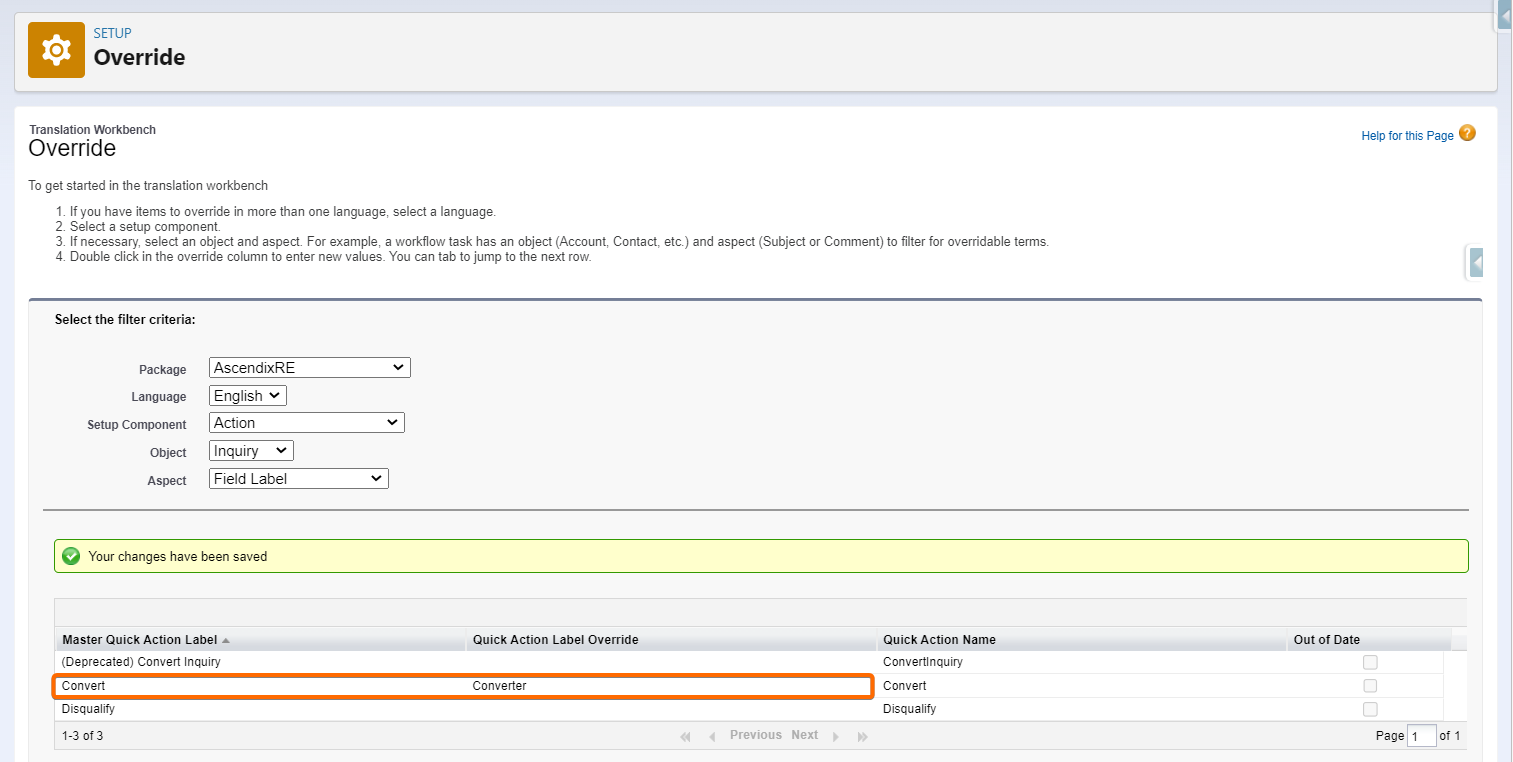
Please note: Quick actions have to be overridden manually: