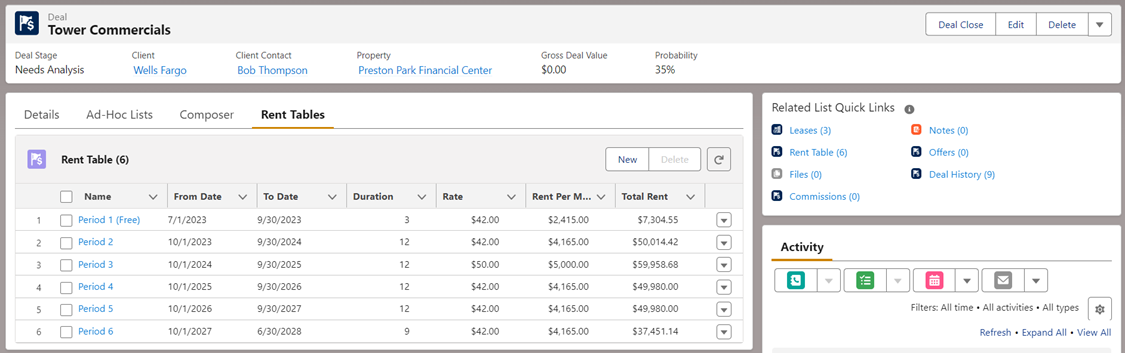
A related list in Salesforce is a list of records that are related to a specific record. By default, related lists are not editable directly from the related list view. Users need to click on individual records in the related list to navigate to their respective detail pages for editing.
To enhance the user experience and make data management more efficient, you can configure the editable grid for related lists and place it in a separate tab on the record. This feature is available in AscendixRE R1.31. With the editable grid, users can quickly edit, add, and delete related records without navigating to individual record pages. This guide will walk you through the steps to set up an editable grid for related lists.
Let’s assume, that we want to configure Editable Grid for the Rent Table on the Deal.
Step 1. Create a new Tab for the Editable Grid.
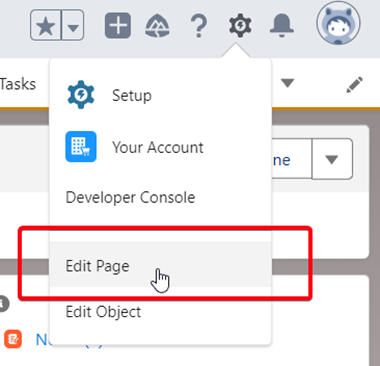
1. Click on Edit Page on the Deal record.
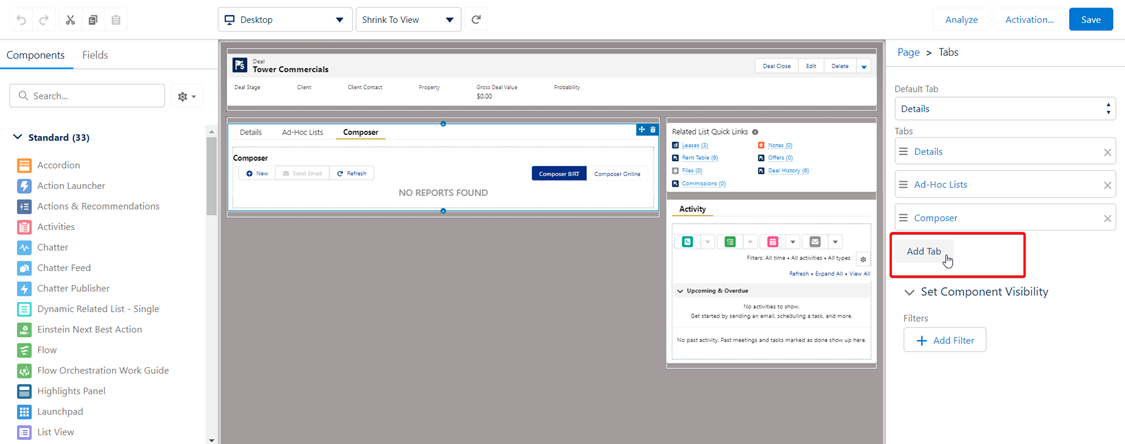
2. Click the Add Tab button on the right side.
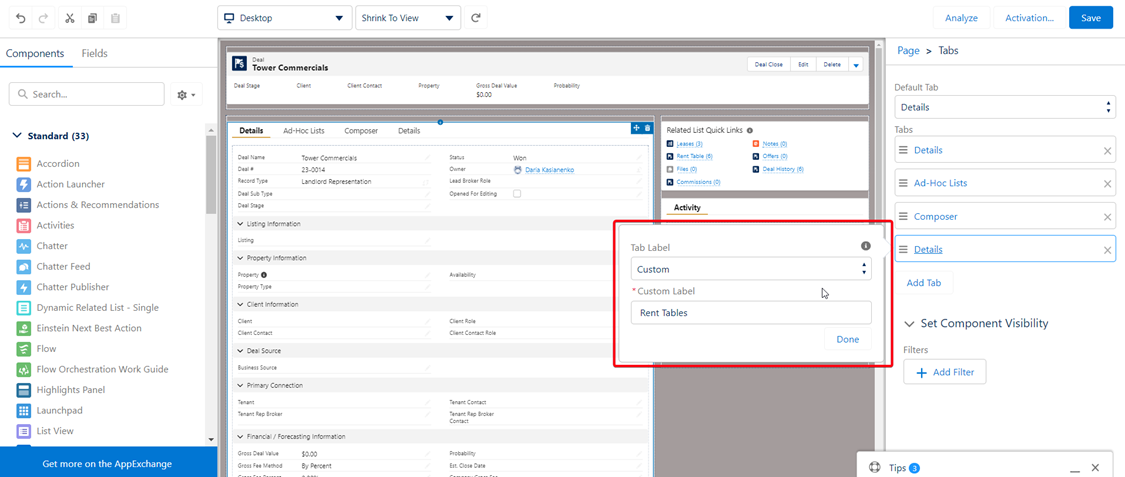
3. By default, the tab will be named Details. Simply click on Details to bring up a choice list. Click the drop-down arrow and choose the top option Custom. In the field provided, type in the name you want to give the Tab – Rent Tables. Click the Done button.
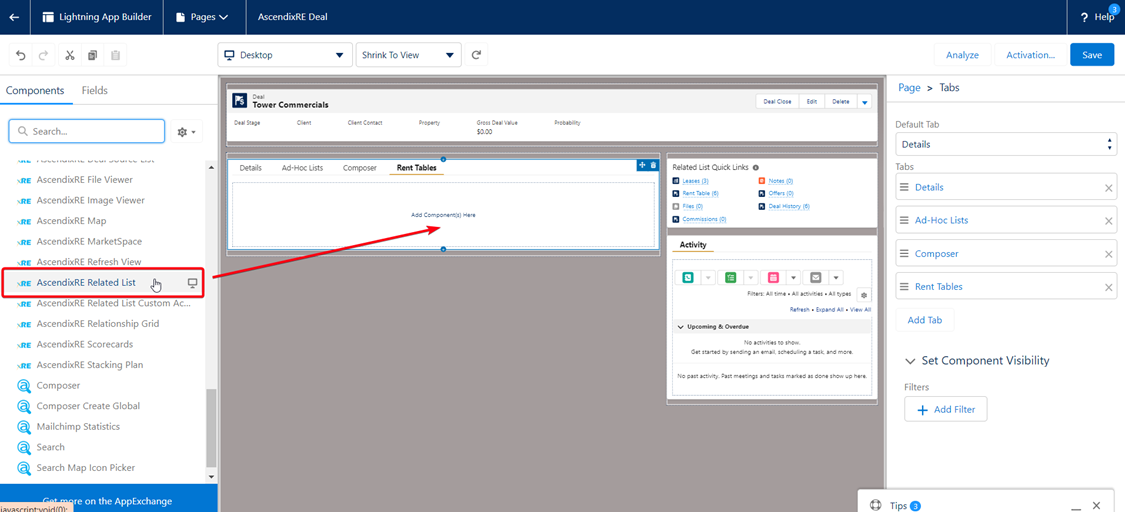
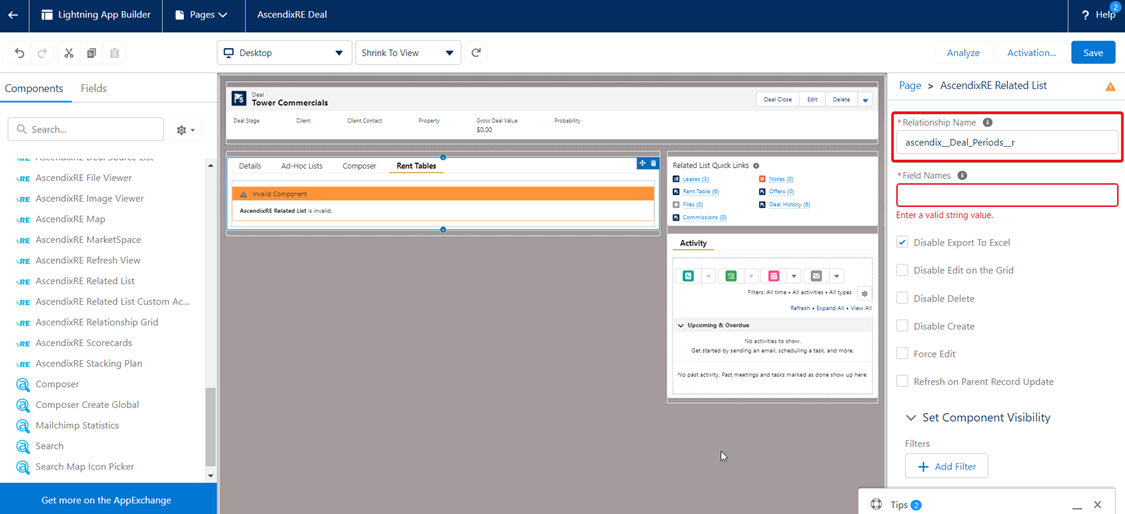
Step 2: Add and configure the AscendixRE Related List component.
1. On the left in the Components section, find the AscendixRE Related List component and drag and drop it on the Rent Tables tab.
2. Enter the following information:
Relationship Name – ascendix__Deal_Periods__r
Field Names - Name;ascendix__FromDate__c;ascendix__ToDate__c;ascendix__Duration__c;ascendix__Rate__c;ascendix__RentPerMonth__c;ascendix__TotalRent__c
Step 3. Add the additional configurations if needed.
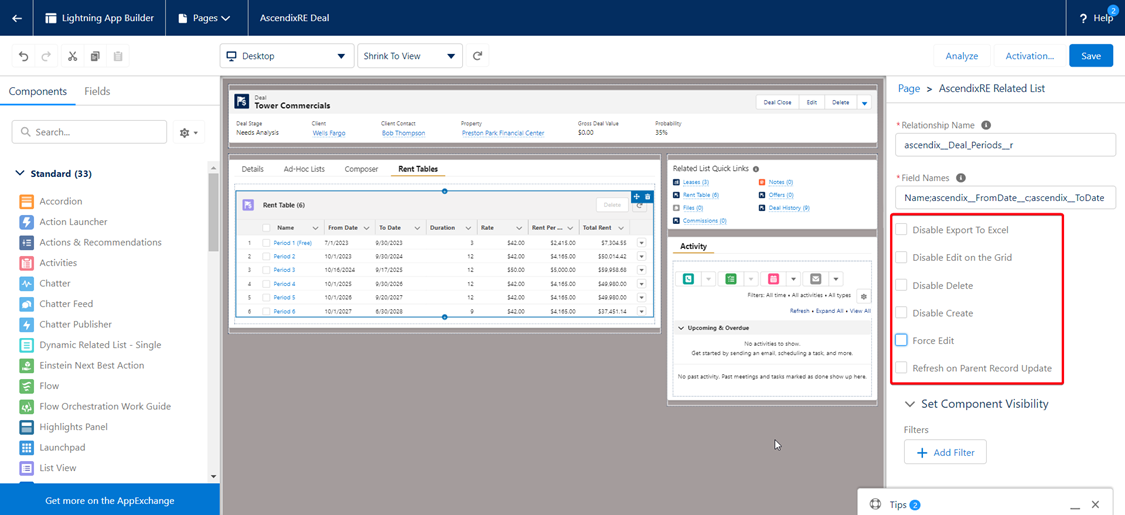
Disable Export to Excel – prevent users from exporting data to Excel from the Editable Grid.
Disable Edit on the Grid – disable the ability to edit data directly in the Editable Grid.
Disable Delete – prevent the deletion of records in the Editable Grid.
Disable Create – disable the ability to create new records in the Editable Grid.
Force Edit – allows you to save changes for the records in the Editable Grid automatically. This means that whenever a user makes some changes to the field, all these record changes will be saved without having to manually click the Save button.
Refresh on Parent Record Update – enable automatic refreshing of the Editable Grid whenever there is an update to the parent record.
Step 4. Save changes.
Click the Save button.
How to find the relationship name for the configuration
Relationship Name is an API name that will uniquely define the Relationship between two objects. To find the Relationship Name:
1. Go to the Object Manager.
2. Search for the object for which you are planning to configure the Editable Grid. We are planning to configure the Rent Table Editable Grid, and in this case, we need to search for the Rent Table object.
3. Click on Rent Table and go to the Fields & Relationships section.
4. Find a field that connects Rent Table with a Deal – Deal field. Click on it.
5. Scroll down a bit and find a Child Relationship Name field - Deal_Periods. Copy and paste it into the Relationship Name field.
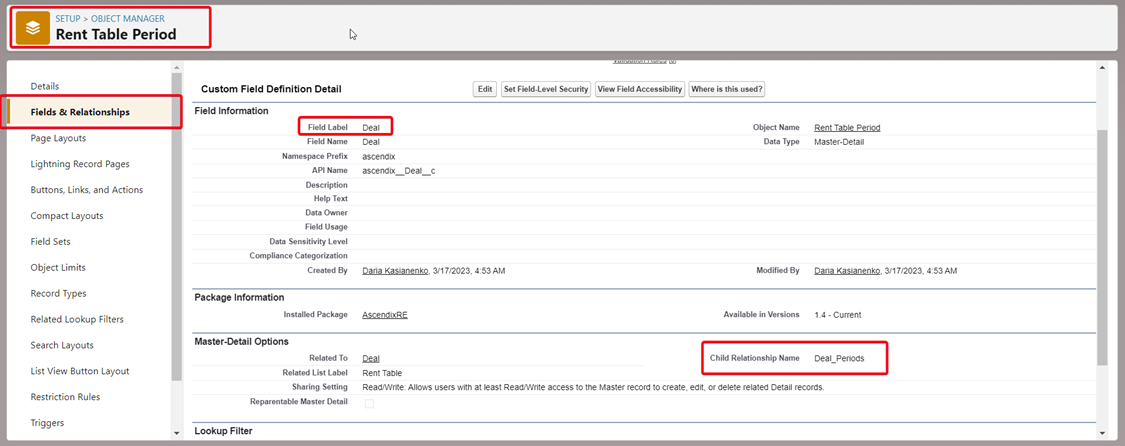
6. Add a prefix “ascendix__” and a suffix “__r” to the Child Relationship Name, so it should be – ascendix__ Deal_Periods__r. Please note, that the correct syntax of this field should be the following: “ascendix__{Child Relationship Name}__r.
How to find the Field Names for configuration
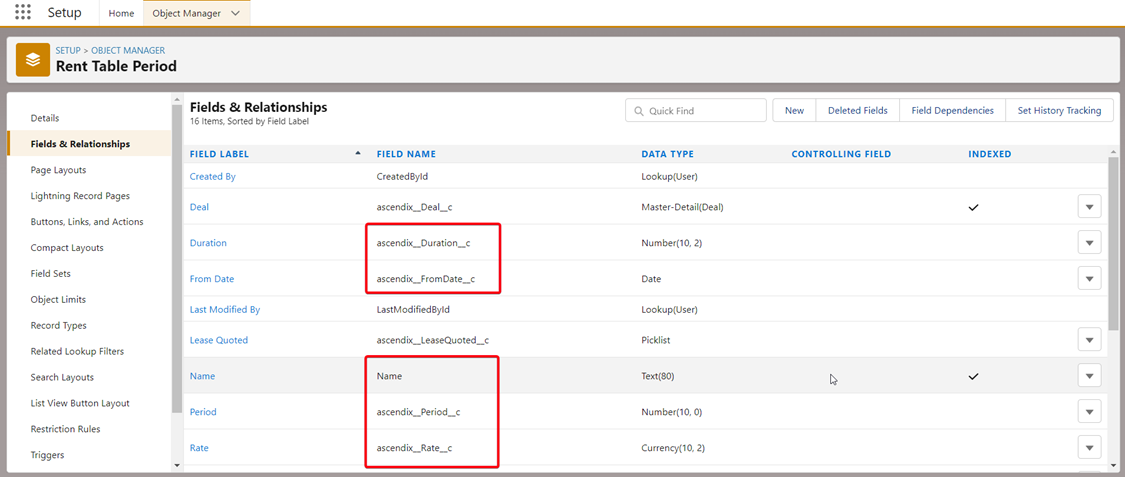
1. Go to the Object Manager.
2. Search for the Object for which you are planning to configure the Editable Grid. We are planning to configure the Rent Table Editable Grid, and in this case, we need to search for the Rent Table object.
3. Click on Rent Table and go to the Fields & Relationships section.
4. Find the fields that you would like to show as columns in the Editable Grid – Name, From Date, To Date, Duration, Rate, Rent Per Month, Total Rent.
5. Copy the field API Name one by one and insert them with the semicolon in the Field Names – Name;ascendix__FromDate__c;ascendix__ToDate__c;ascendix__Duration__c;ascendix__Rate__c;ascendix__RentPerMonth__c;ascendix__TotalRent__c