Geocoding is an optional feature that allows users to generate location information for each record using the GoogleAPI service.
Let's say you want to set up geocoding for the Account object. Follow the steps below to make configurations:
1. Go to Object Manager.
2. Find and select the object for which you want to configure a Geocoding.
3. Create custom Text fields. For example: Country, State, City, Street Name, Building Number, and Postal Code.
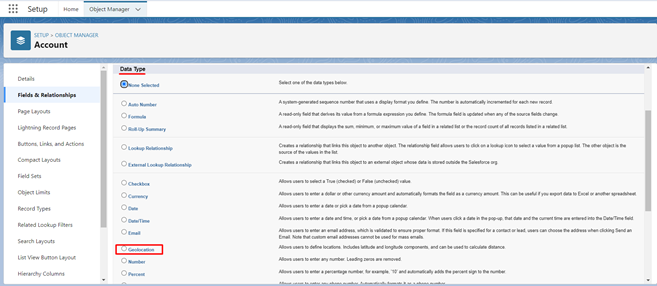
4. Create a Geolocation field.
5. From Setup, enter Flows in the Quick Find box, and then select Flows.
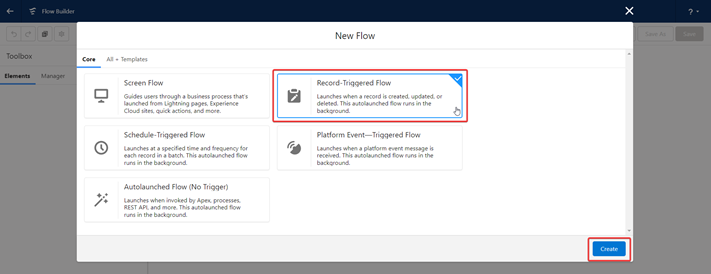
6. Click the New Flow button in the top right corner.
7. In the New Flow window choose the Record-Triggered Flow, and then click the Create button.
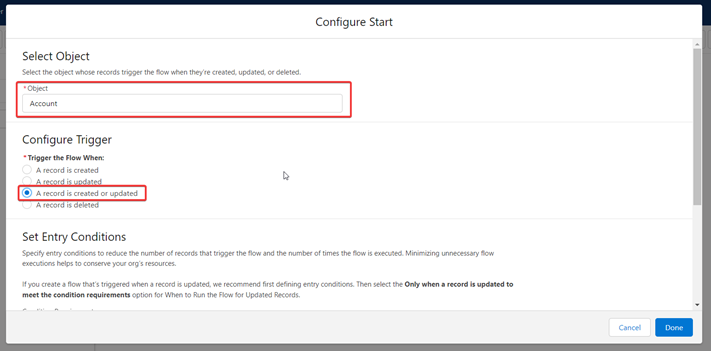
8. In the Configure Start dialog choose the Account object.
9. For Trigger the Flow When select “A record is created or updated”.
10. For Condition Requirements select “Formula Evaluates to True”.
11. Insert the following code in the Formula field by replacing the _Country_, _State_, _City_,_StreetName_, _BuildingNumber_, _PostalCode_values with the API values of your custom address fields created in step 3.
Template:
ISNEW() ||
ISCHANGED({!$Record._Country_}) ||
ISCHANGED({!$Record._State_}) ||
ISCHANGED({!$Record._City_}) ||
ISCHANGED({!$Record._StreetName_}) ||
ISCHANGED({!$Record._BuildingNumber_})||
ISCHANGED({!$Record._PostalCode_})
In our case:
ISNEW() ||
ISCHANGED({!$Record.Country__c})||
ISCHANGED({!$Record.State__c}) ||
ISCHANGED({!$Record.City__c}) ||
ISCHANGED({!$Record.Street_Name__c})||
ISCHANGED({!$Record.Building_Number__c})||
ISCHANGED({!$Record.Postal_Code__c})
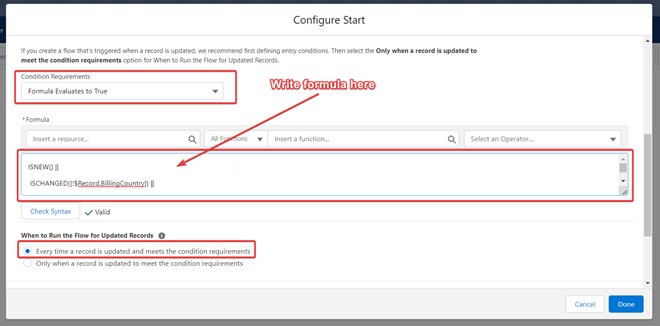
12. Click the Check Syntax button under the Formulafield to make sure there are no errors in the formula.
13. For When to Run the Flow for Updated Records select “Every time a record is updated and meets the condition requirements”.
14. For Optimize the Flow for select “Actions and Related Records”.
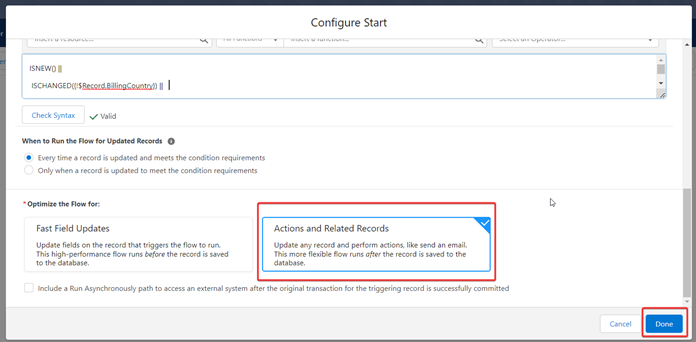
15. Click Done.
16. Click on Add Element.

17. Select Action.
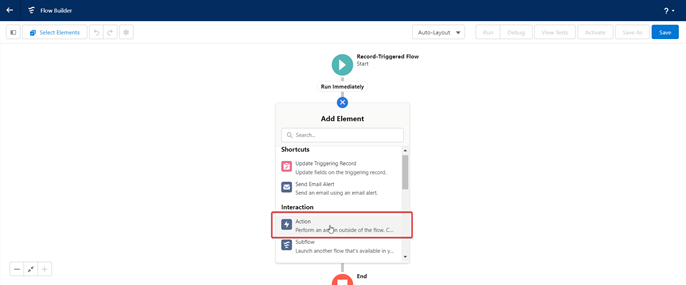
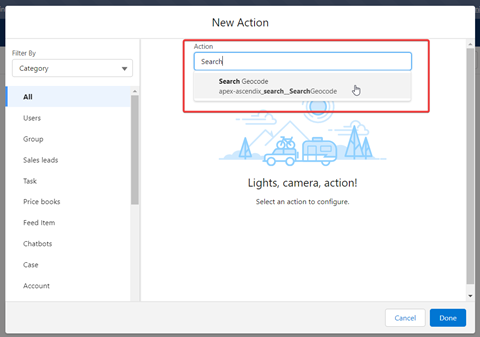
18. In the New Action window in the Action search box start typing and then select Search Geocode.
19. Enter a Label and API Name (required) for the new action, and provide a Description (Optional).
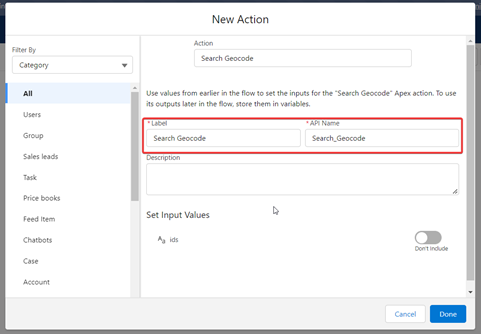
20. For Set Input Values drag the slider to the right - to Include.
21. In the ids field insert {!$Record.Id}.
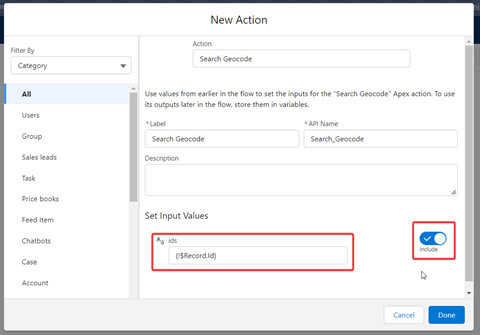
22. Click Done.
23. Save the Flow by entering the Flow Label and Flow API Name(required), and Description (Optional).
24. Click the Save button and Activate.
How to Configure Geocoding
Weadded a new Geocoding Tab to Ascendix Search Setup from where you canenable/disable geocoding.
Step 1. Navigate to Ascendix Search Setup>Geocoding Tab and Enable geocoding.
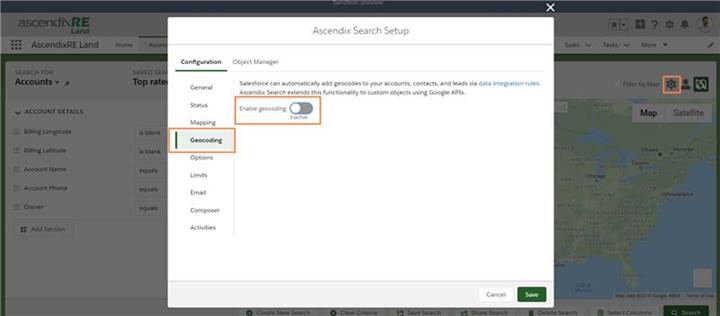
AscendixSearch – Enable Geocoding
Step 2. Enter your Google Maps Key, daily update limit, and enter an email to get notified of errors. Check our Admin guide for detailed instructions on how to get a Google Maps Key or how to check the Google API Key status.
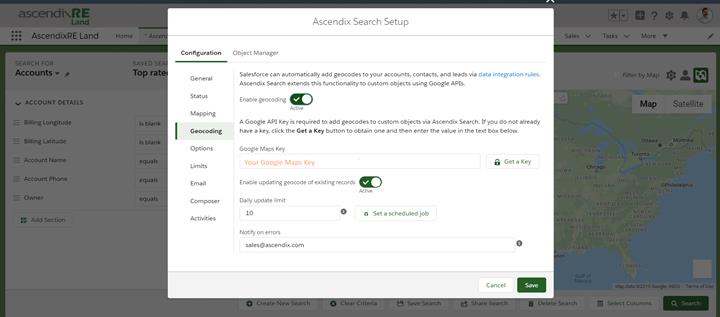
AscendixSearch – Geocoding Settings
Step 3. Follow the Geocoding configuration instructions to enable this feature for each object. When you are done, Navigate to Ascendix Search Setup > ObjectManager
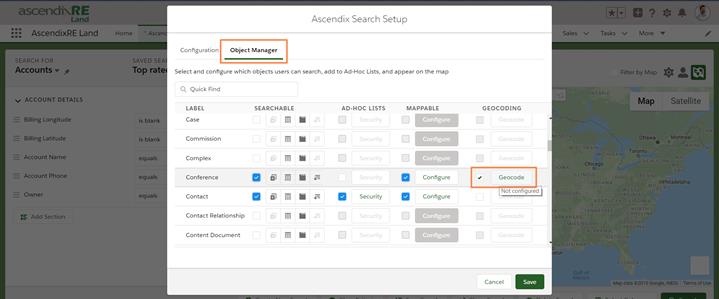
Step 4. Specify geocode fields and click save.
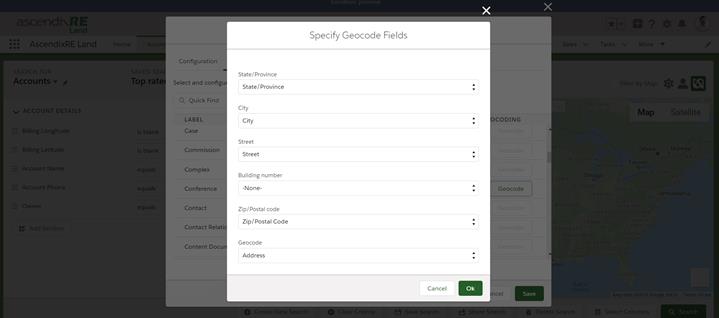 Ascendix Search – Specify Geocode Fields
That's it! Now you’ll be able to geocode selected custom objects in your Salesforce.
Read Also
Custom Map Icons Configuration
Add Record Detail Information To The Pop-up Window
Ascendix Search Configuration: Google Maps Key