Ascendix Search Admin can define default column results for each object to display relevant information.
Here is how to configure columns:
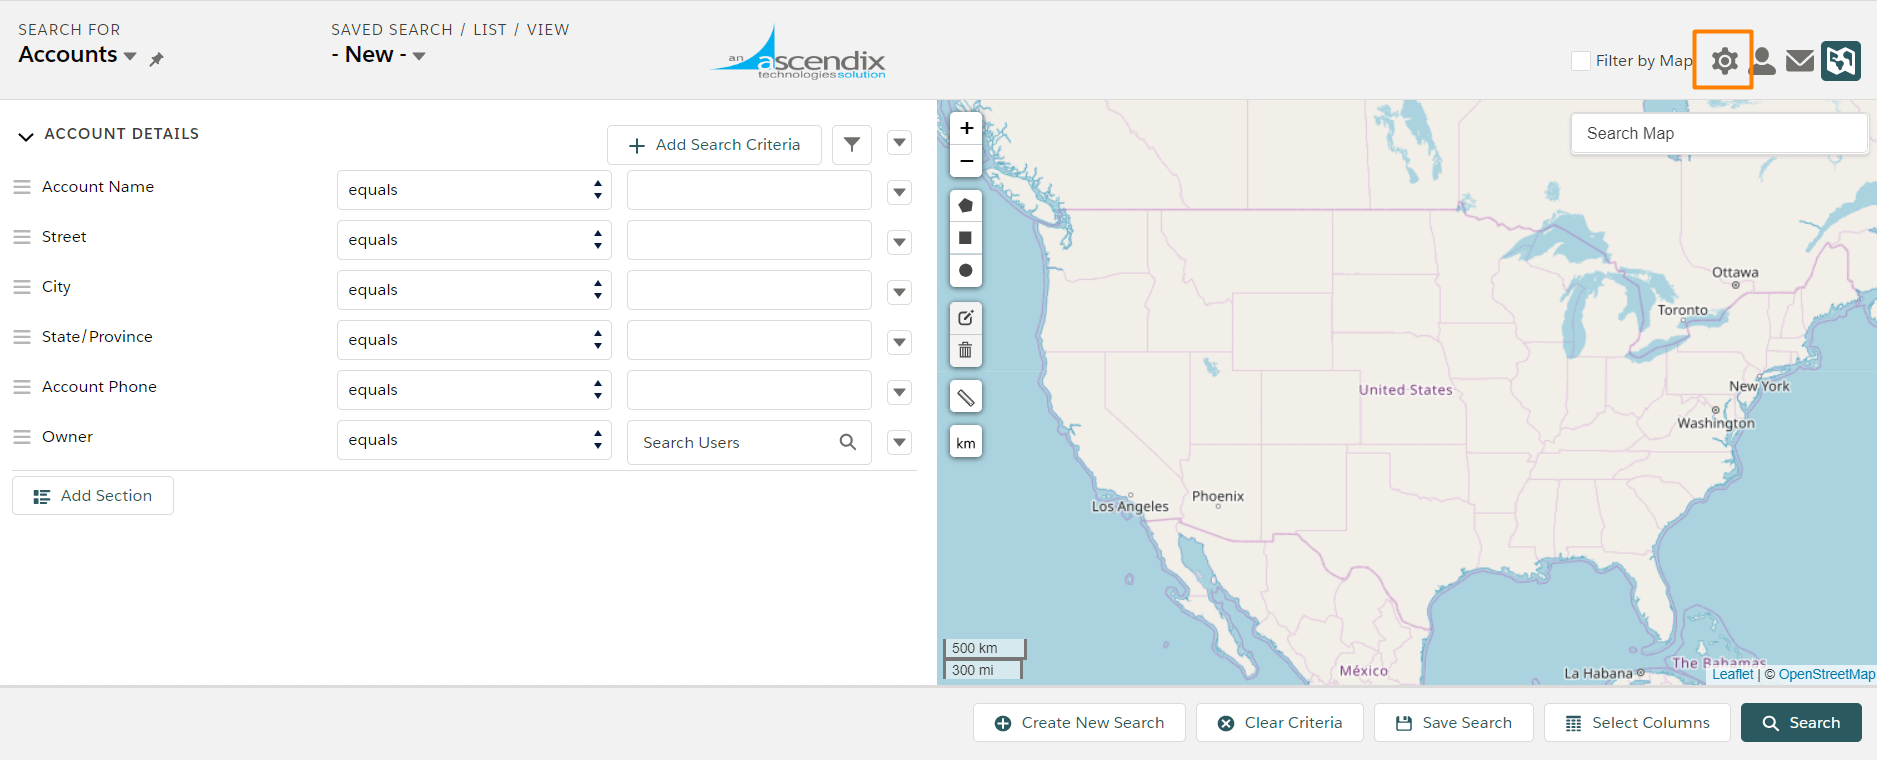
Step 1. Click on the gear icon in the top right next to the pop-out window icon to open Ascendix Search Setup.
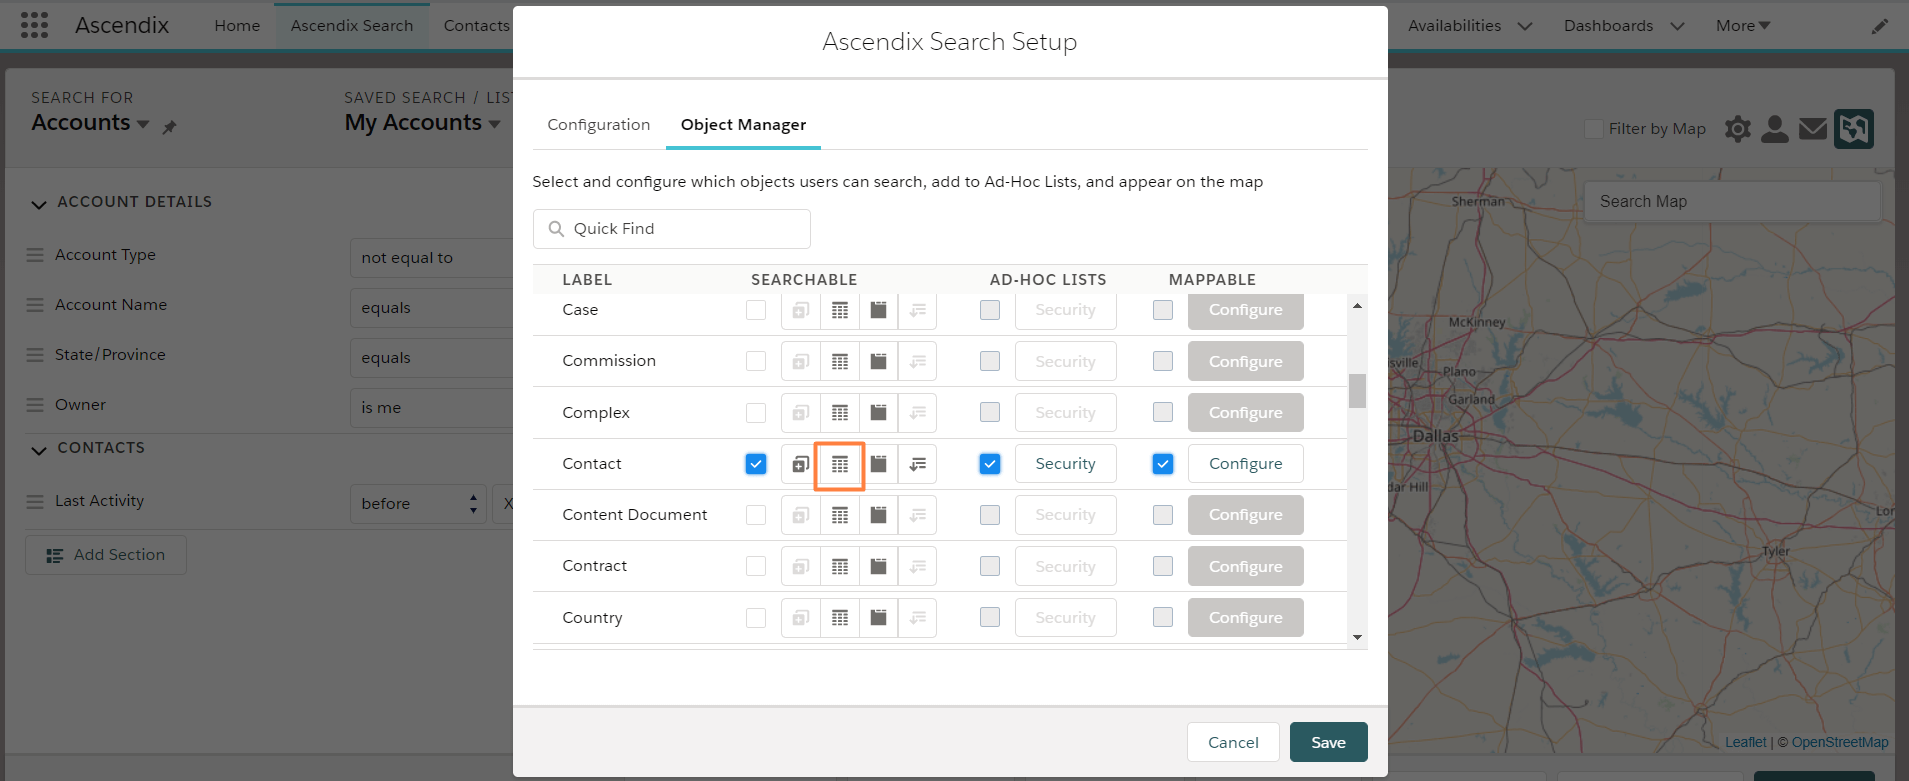
Step 2. From here click on the Object Manager
Step 3. Select the column icon to set the default columns
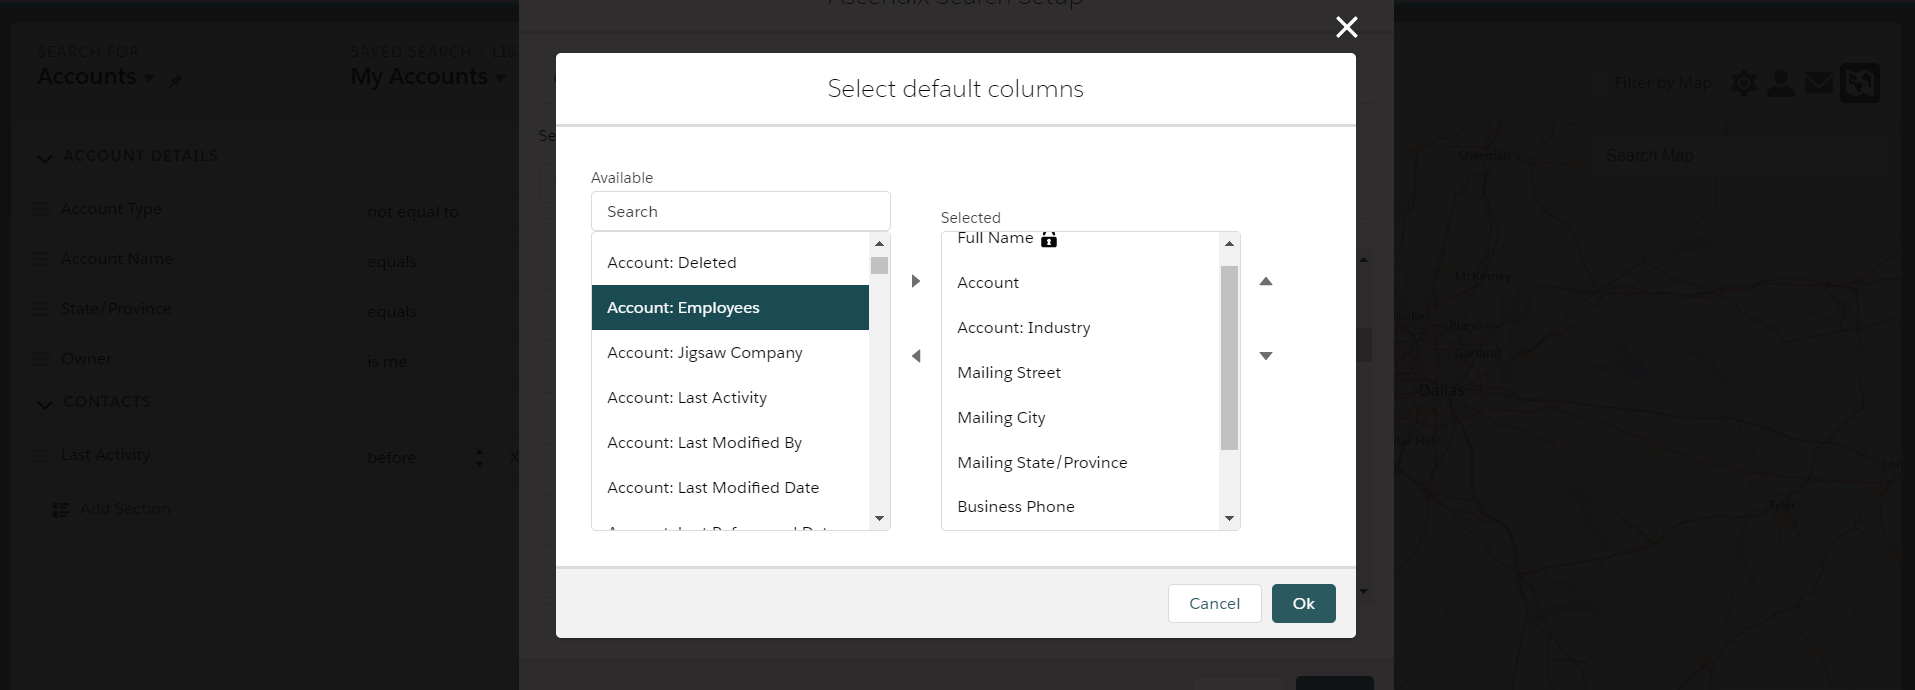
Step 4. Now you can quickly select what kind of information you want to be displayed for the object. Use arrows to add, remove or reorder columns. Note that Ascendix Search lets you add columns from related objects. E.g., you can add Account industry and Employee number to your contact list. It might help you to customize your message or prioritize contacts.
Users can customize columns as well, but they will be able to do it not for an Object, but for their lists.
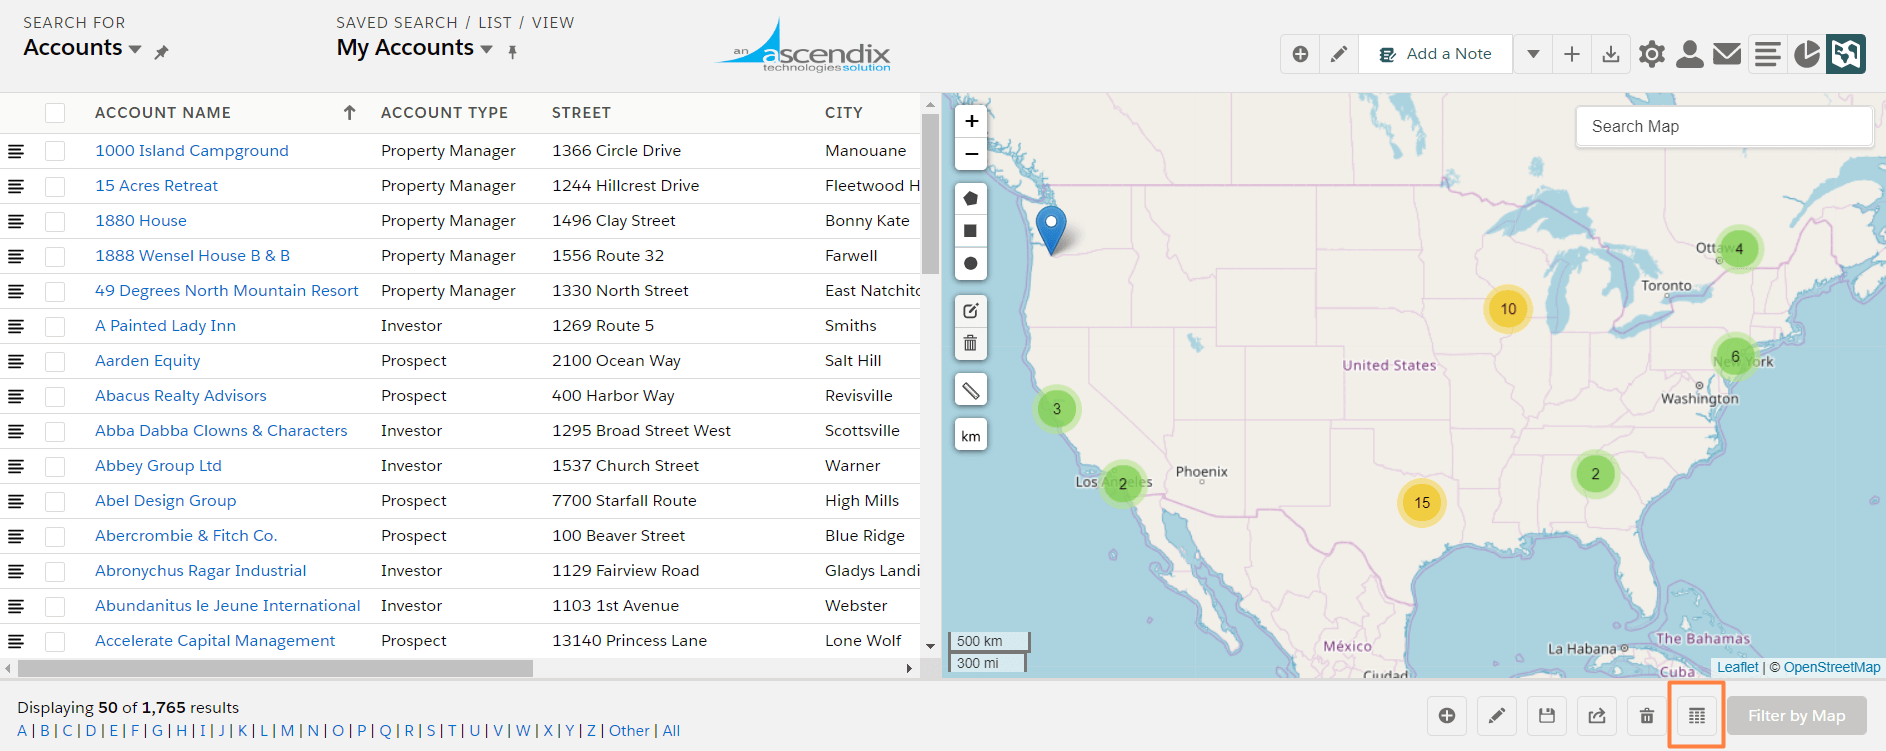
Step 1. Click Select Columns button from the bottom right of your search results
Step 2. Use arrows to add, remove or reorder columns and click OK when you are done.
Note, that you should save the search to keep the order of the columns. Also, you will need to customize columns for each saved search.