The admin user can configure different Deal Close buttons depending on the RecordType. Suppose you need to configure a Deal Close button for the New Record Type so that the following conditions are met:
- When you close the Deal, a Sale record should be created.
- When you close the Deal, the Buyer and Buyer contact fields should be auto-populated from the Deal record to the Sale record.
First, you need to go into the Flow and change the setting so that when you close the Deal with a new Record Type, the Sale record will be created:
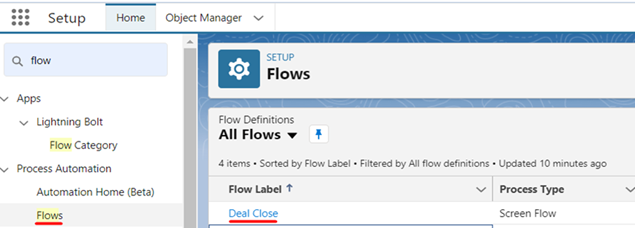
1. Go to the Flow in Setup ( the gear icon on the top right).
2. Click on Deal Close flow.
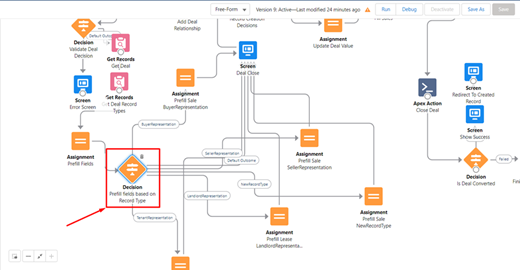
3. In the Manager tab find Formulas (IsLeaseAvailable /IsListingAvailable / IsSaleAvailable).
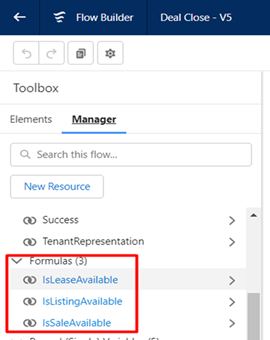
4. According to the condition of our example, when the Deal closes, a Salerecord should be created. Then, click the IsSaleAvailable. The Edit Formula window will pop up.
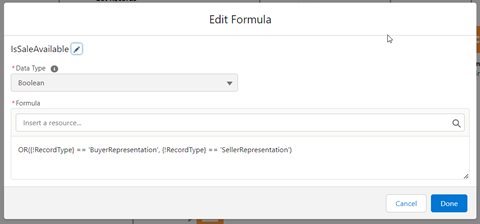
5. Add your Record Type Name and click Done.

The next step is to configure the field mapping that should be auto-populated after the Deal is closed:
6. Configure the mapping fields when converting Deal to Sale. Click on Decision Prefill fields based on Record Type.
7. In the Edit Decision window click New Outcome (plus icon) and fill in the required fields:
- Label – provide the label
- Outcome API Name – will be auto-populated after providing the label
- Resource – {!RecordType}
- Operator – Equals
- Value – Record Type Name
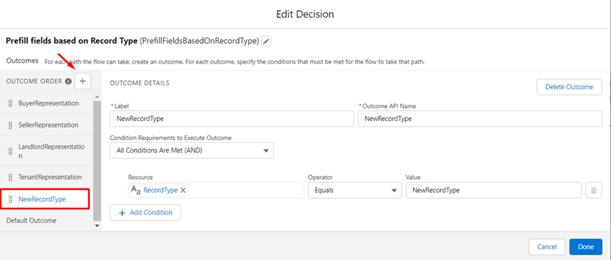
8. Click Done.
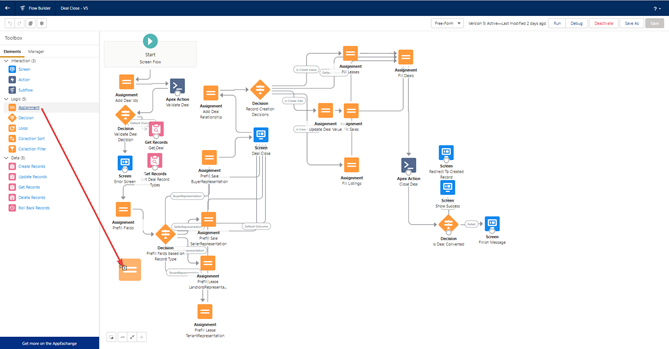
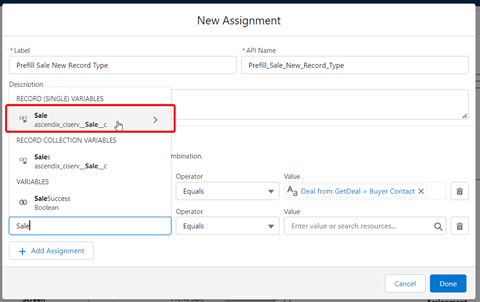
9. From the Elements tab drag and drop the Assignment to the flow area:
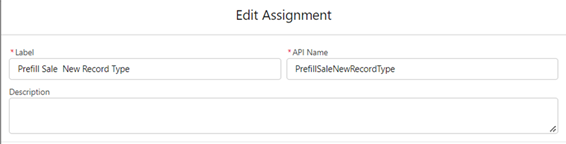
10. Fill in the requiredfields: Label and API Name, Description (optional).
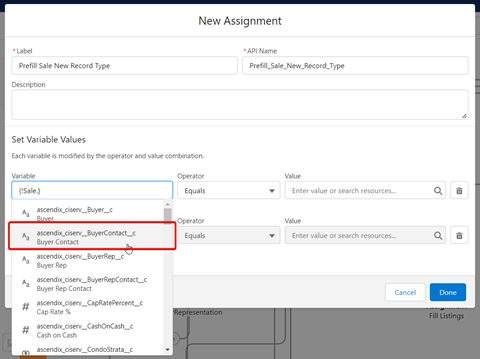
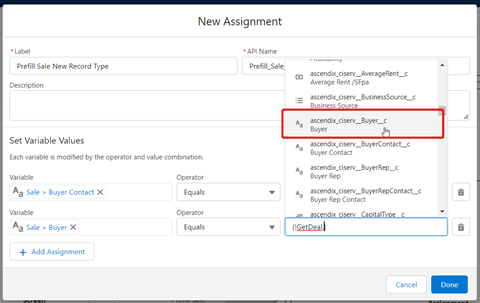
11. Create a mapping for theSale record from the Deal (Buyer Contact field).
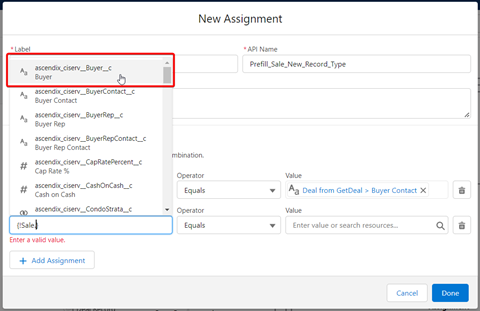
- Variable – select Sale (ascendix_Sale__c) -> select Buyer Contact (ascendix__BuyerContact__c)
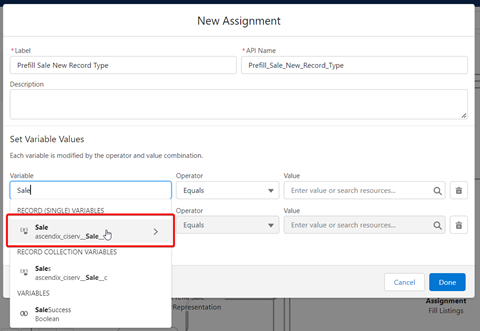
- Operator– Equals (by default)
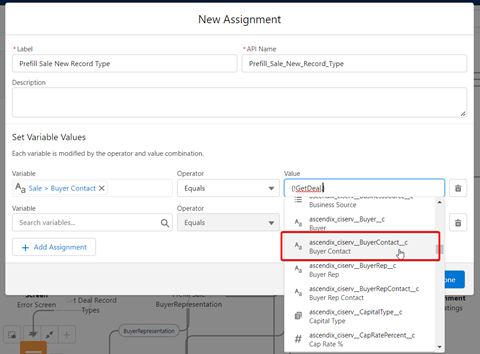
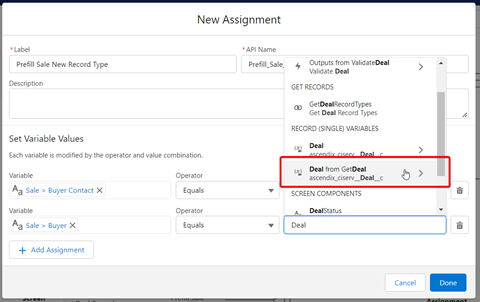
- Value – select Deal from GetDeal (ascendix__Deal__c) -> select Buyer Contact(ascendix__BuyerContact__c)
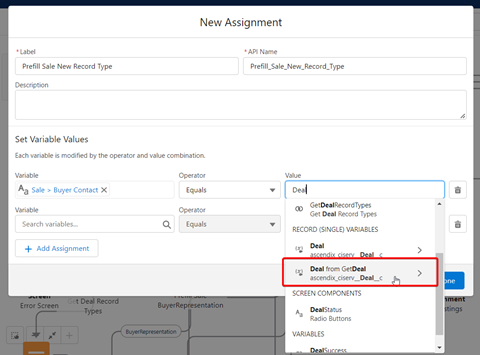
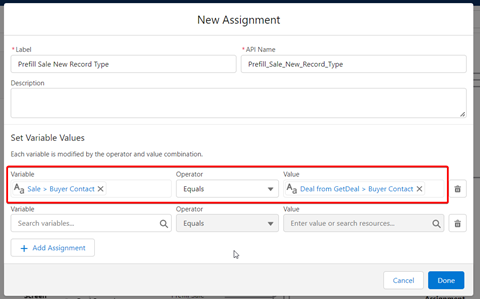
12. Let’s create a mapping for the Sale record from the Deal (Buyer field):
- Variable – select Sale (ascendix_Sale__c) -> select Buyer Contact(ascendix__Buyer__c)
- Operator– Equals (by default)
- Value – select Deal from GetDeal (ascendix__Deal__c) -> select Buyer(ascendix__Buyer__c)
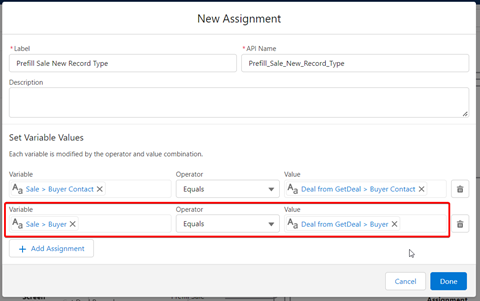
13. Click the Done button.
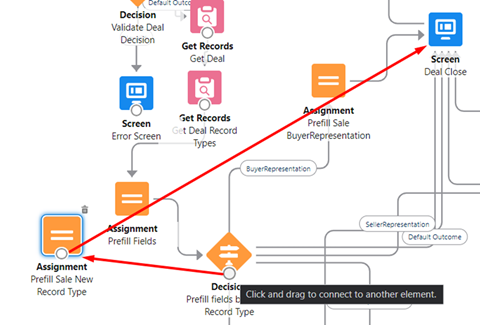
Then, you should make a new connection between the Decision, the new Assignment and the Screen. Save new Flow:
14. Make a connection from the Decision to the newly created Assignment, and from the Assignment to the Screen Deal Close.
15. In the top right corner click on Save As.
16. Fill in the information for the Flow Label and Flow API Name, and Description (optional).
17. Click the Save button.
Finally, you should configure anew Deal Close button.
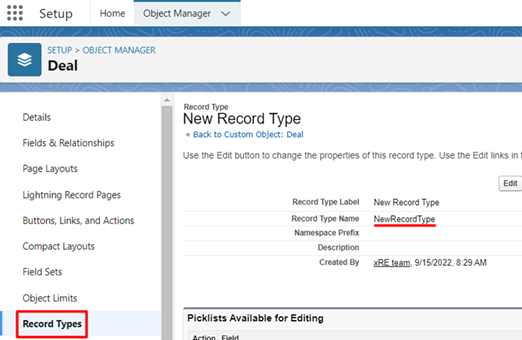
18. Go to the Deal object in the Object Manager.
19. Select Buttons,Links and Actions tab and click on New Action.
- Action Type – select Flow option
- Flow - select created flow
- Label - will be displayed on the page
- Name – API of the Action (filled automatically)
- Description – optional

20. Click Save.
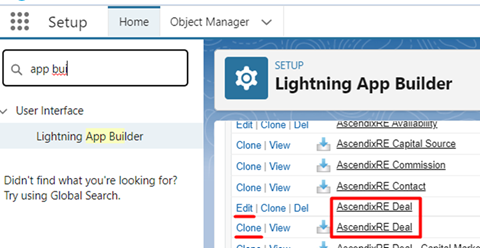
21. Go to Lightning AppBuilder in the Setup and open Ascendix Deal (clone if you have a standard lightning page or edit if it has already been cloned).
22. Click the Highlights Panel and then, click the Add Action button.
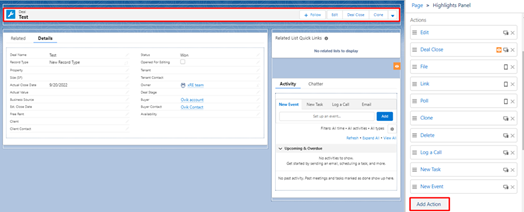
23. Start typing and thenselect the created action.
24. Click on Add Filter:
- Field – Status
- Operator – Equal
- Value – Open

25. Click Done twice.
26. Click Save and activate a page by default.
27. If you want to add a newaction for all record types or if you want to configure only for one record type: click the Activate -> APP, RECORD TYPE, AND PROFILE tab-> click on Assign to Apps, Record Types, and Profiles button ->Ascendix -> Next -> Select needed record type -> Select in the Profiles to display the “AscendixRE” record page -> Save -> Save.