Adding an image to your email signatures is a great way to add color and branding to every email you send. We'll show you how to put your personalized signature in Salesforce.
Uploading Your Image into Documents Tab
Setting up an email signature in Salesforce will save you time. We'll show you how to put your personalized signature for future emailing using the Salesforce Classic and Lightning Experience:
Step 1. Click on the Profile icon and select “Switch to Salesforce Classic”: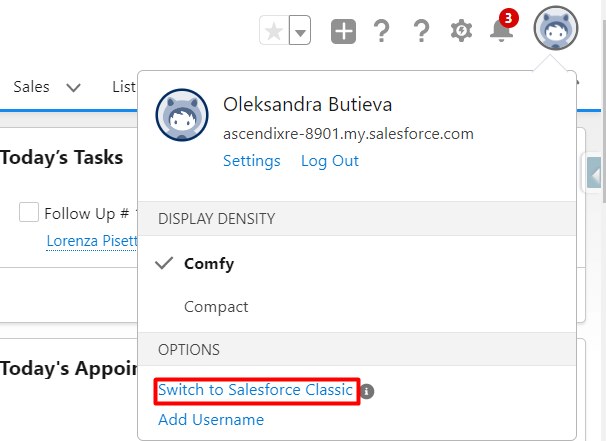
Step 2. Click on the plus icon (All Tabs) an select the "Documents" tab.

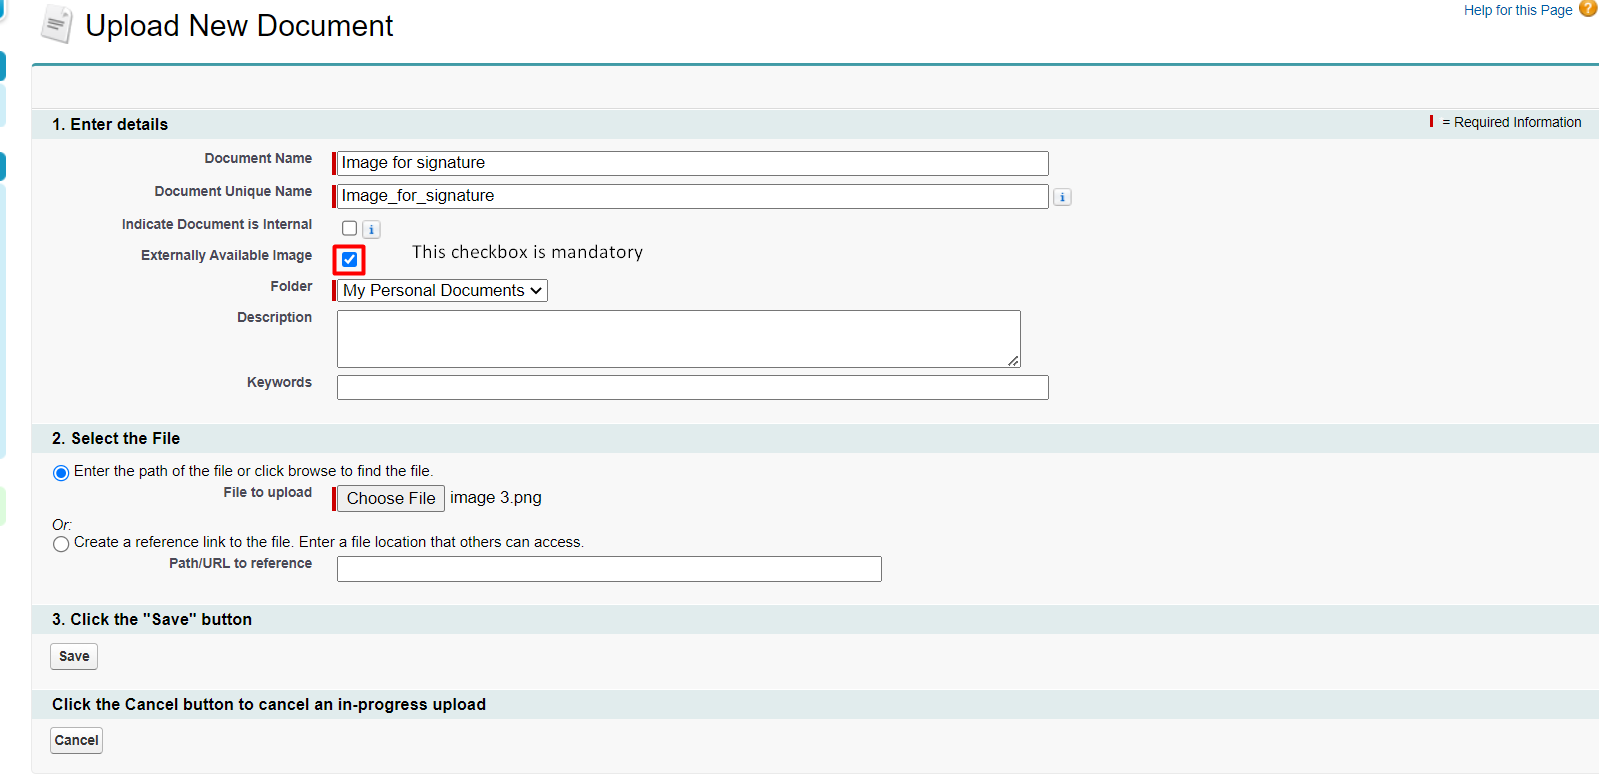
Step 3. Click the New button.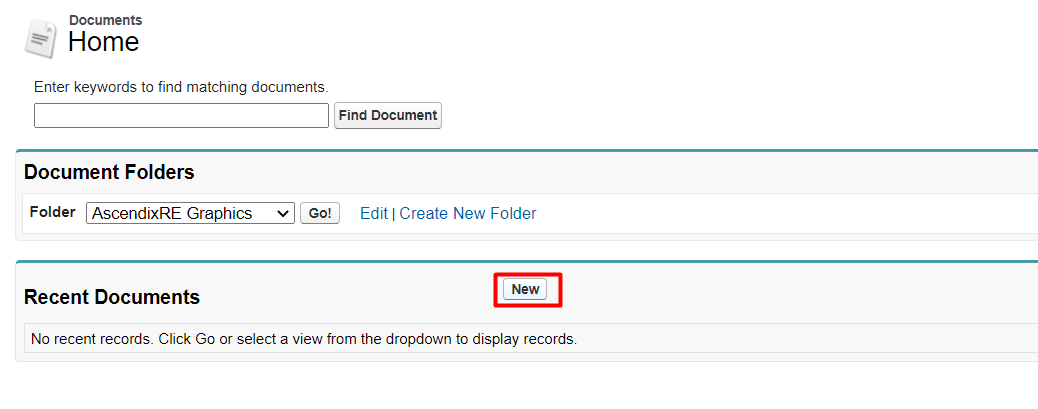 Step 4. Enter the document name, check the “Externally Available image” checkbox, upload the image you want to include in your signature and hit the Save button.
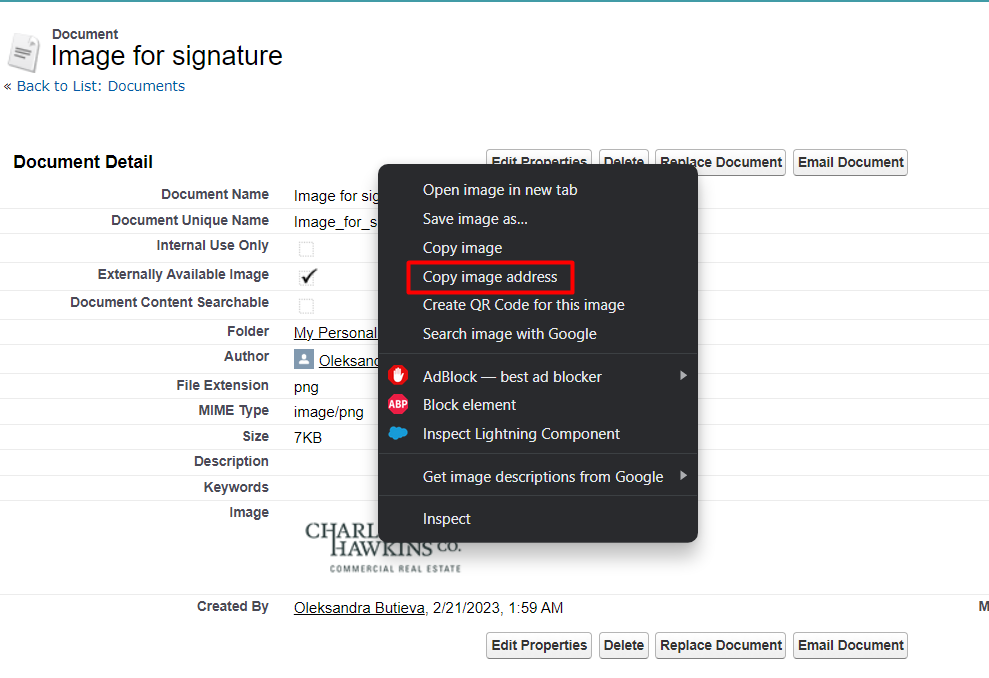
 Step 5. On the next page, click on the uploaded image and select “Copy Image Address”.
 Step 6. Click on your name at the top of the page and then click “Switch to Lightning Experience”.
And then, complete the steps from the “Adding the Image to Your Email Signature".
Adding the Image to Your Email Signature
Step 1. Click on your avatar image at the upper right-hand corner of the screen.
Step 2. Click Settings.
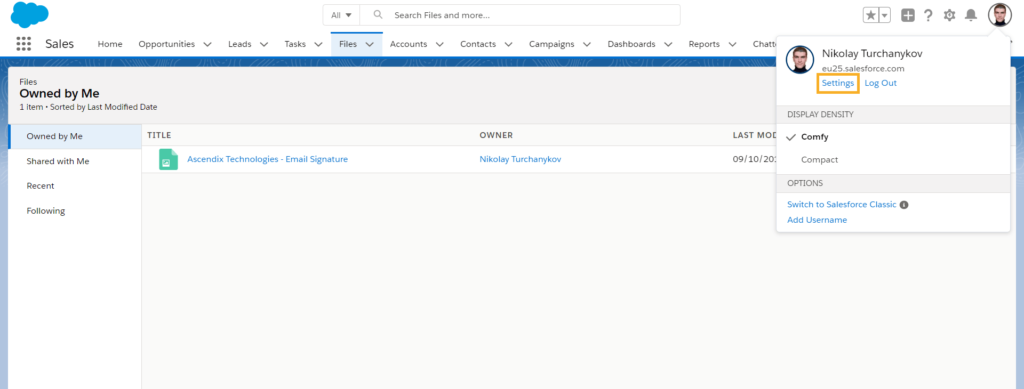 User Settings
Step 3. In the Quick Find search box on the left side of the screen, type-in My Email Settings.
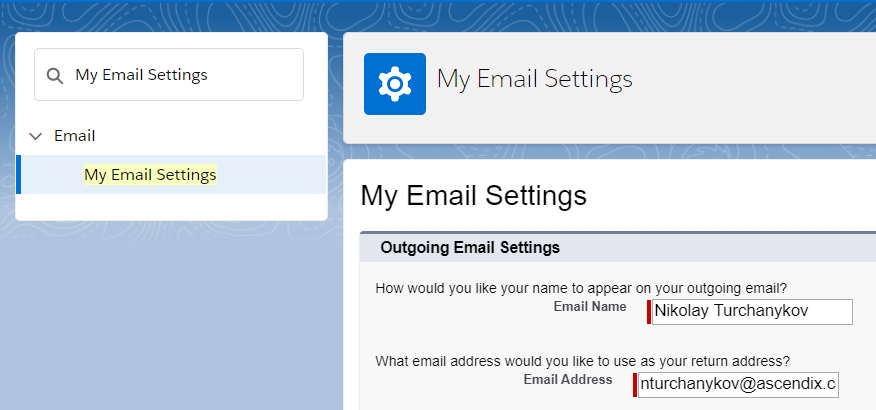 Type-in My Email Settings in the Quick Find search box
Step 4. Click on My Email Settings.
Adding Email Signature
Step 6. Click Save.
It’s important to note that this will only work when sending emails in HTML format. However, if you send an email in plain text format it will display <img src = "link here"/> in the signature.
In Lightning Experience signatures will be added to all personal emails automatically, but inserting any template will overwrite current email and signature. Signatures won’t be added to emails that use HTML templates, as signatures need to be part of the template.